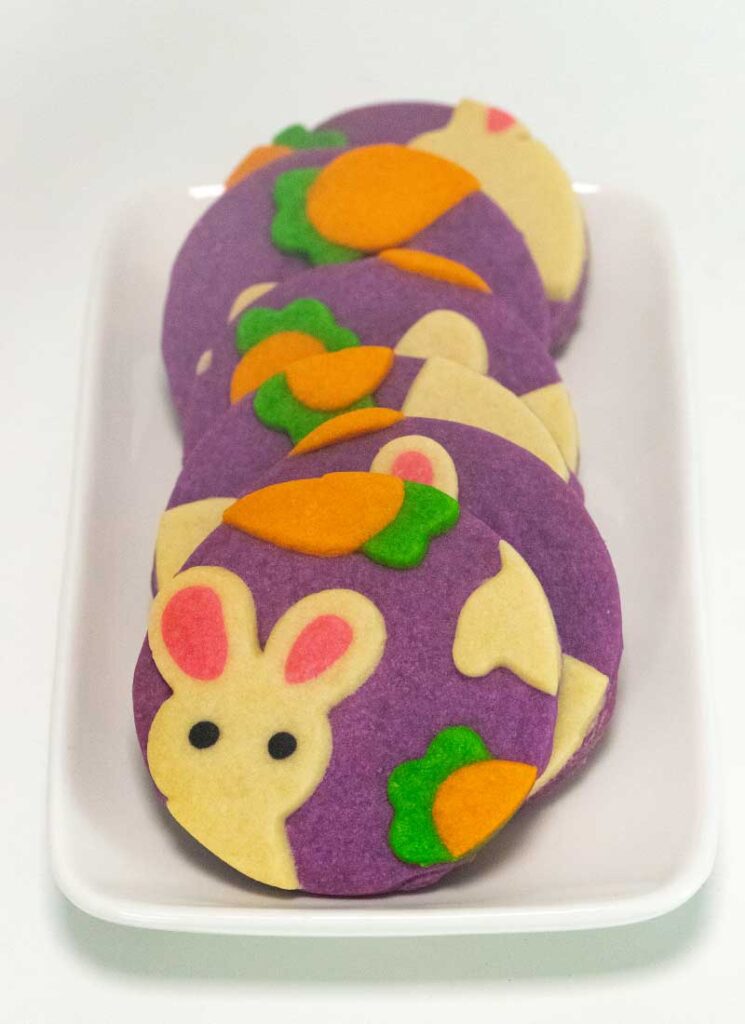
These shortbread cookies have the design printed onto them with the help of cookie dough! These are a great way to have decorated cookies without the headache of piping and royal icing.
Once the pattern has been placed on the cookies, simply cut out the cookie dough with your favorite shaped cookie cutter and voila! It looks like edible fabric, I think it’s so cool!

Ingredients for Easter Shortbread Cookies

How to Make my Easter Shortbread Cookies
Step 1: Make the cookie dough.
Preheat the oven to 325F. Beat the butter with an electric mixer until light and fluffy. Add the powdered sugar and beat until fluffy. Add the vanilla extract and beat until combined.


In a separate bowl, combine the flour and salt, then add this to the butter mixture, mixing until the dough sticks together when pinched.
Step 2: Make the pattern.
Divide the dough in half. Dye one half pale purple. Divide the remaining dough in half. Leave one half white. This will be for the bunnies. Take about 2 tablespoons of dough from the bunny dough. Dye 1 tbsp black and 1 tbsp pink. Take the large, remaining half of dough and divide it into 1/3 and 2/3 pieces. Dye the larger piece orange and the smaller piece green.

Roll the purple dough out on a lightly floured surface to about ¼-inch thick. It doesn’t need to be a particular shape. Transfer it to a sheet of parchment paper and set aside.

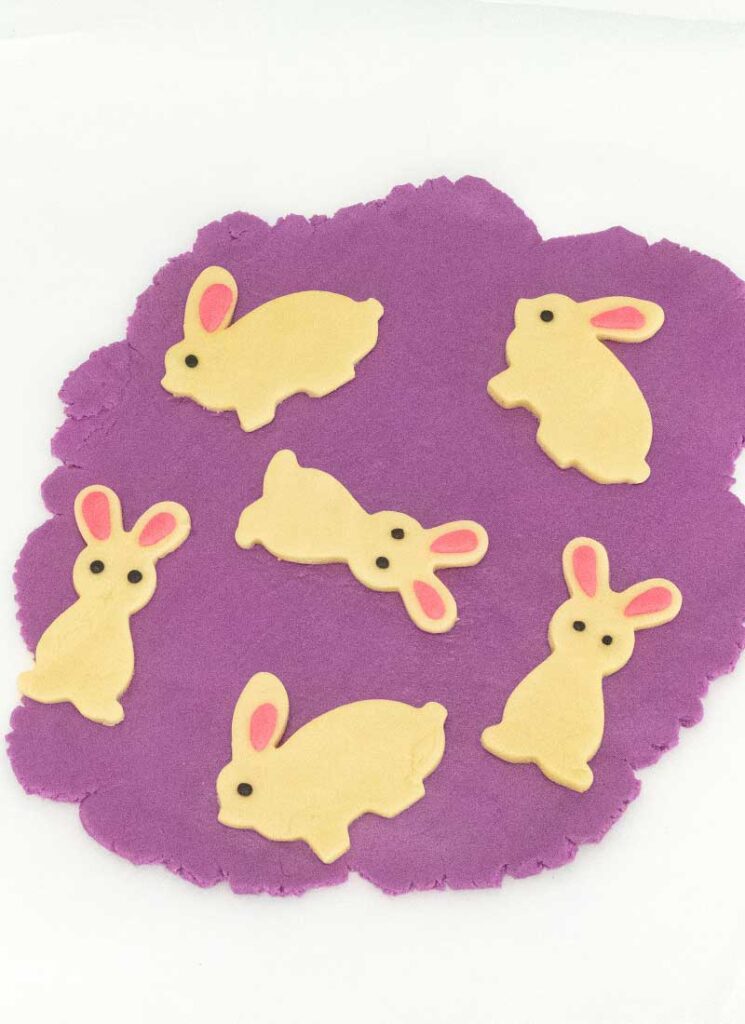
Make the bunnies. On a lightly floured surface, roll the white dough out to ¼-inch thick. Use a rabbit-shaped cookie cutter to cut out rabbits and place these onto the purple sheet of cookie dough. Be sure to leave enough space in between the rabbits for the carrots!
Use the black and pink dough to make the bunnies’ eyes and ears. You don’t have to roll the dough out, simply shaping them with your fingers and sticking them onto the rabbits will work. When making the eyes, make them a little smaller than you’d like, as they will flatten out slightly in a later step.

Make the carrots. On a lightly floured surface, roll the orange dough out to ¼-inch thick. Cut little triangles out of the dough. If you have a carrot-shaped cookie cutter, you can use this, but be sure to not use the “stem” portion, as we’ll use the green dough for that! Place the carrots onto the sheet of purple dough, leaving room for the stems.
Then roll out the green dough and cut little carrot tops. Stick them onto the carrots.


Step 3: Cut out the cookies.
You will be left with a large patterned cookie. Gently roll a rolling pin on top of the dough to stick the design to the purple base.


Then cut out cookies using a 3 to 4-inch sized cookie cutter.
Transfer the cookies to a baking sheet lined with parchment paper and place them in the fridge for about 30 minutes. This will stiffen the cookies and prevent them from spreading too much during baking.

Bake the cookies for 10-15 minutes, or until the edges are just slightly golden. Cool on the baking sheet for 10 minutes, then transfer to a wire rack and cool completely.
More Easter Recipes to Try!

Easter Shortbread Cookies
Equipment
Ingredients
- 1 cup unsalted butter room temperature
- ½ cup powdered sugar
- 2 tsp vanilla extract
- 2 cups all-purpose flour
- ½ tsp salt
- orange, green, pink, purple and black food coloring
Instructions
- Preheat the oven to 325F. Beat the butter with an electric mixer until light and fluffy. Add the powdered sugar and beat until fluffy.
- Add the vanilla extract and beat until combined.
- In a separate bowl, combine the flour and salt, then add this to the butter mixture, mixing until the dough sticks together when pinched.
- Divide the dough in half. Dye one half pale purple. Divide the remaining dough in half. Leave one half white. This will be for the bunnies. Take about 2 tablespoons of dough from the bunny dough. Dye 1 tbsp black and 1 tbsp pink. Take the large, remaining half of dough and divide it into 1/3 and 2/3 pieces. Dye the larger piece orange and the smaller piece green.
- Roll the purple dough out on a lightly floured surface to about ¼-inch thick. It doesn’t need to be a particular shape. Transfer it to a sheet of parchment paper and set aside.
- Make the bunnies. On a lightly floured surface, roll the white dough out to ¼-inch thick. Use a rabbit-shaped cookie cutter to cut out rabbits and place these onto the purple sheet of cookie dough. Be sure to leave enough space in between the rabbits for the carrots! Use the black and pink dough to make the bunnies’ eyes and ears. You don’t have to roll the dough out, simply shaping them with your fingers and sticking them onto the rabbits will work. When making the eyes, make them a little smaller than you’d like, as they will flatten out slightly in a later step.
- Make the carrots. On a lightly floured surface, roll the orange dough out to ¼-inch thick. Cut little triangles out of the dough. If you have a carrot-shaped cookie cutter, you can use this, but be sure to not use the “stem” portion, as we’ll use the green dough for that! Place the carrots onto the sheet of purple dough, leaving room for the stems. Then roll out the green dough and cut little carrot tops. Stick them onto the carrots.
- You will be left with a large patterned cookie. Gently roll a rolling pin on top of the dough to stick the design to the purple base. Then cut out cookies using a 3 to 4-inch sized cookie cutter.
- Transfer the cookies to a baking sheet lined with parchment paper and place them in the fridge for about 30 minutes. This will stiffen the cookies and prevent them from spreading too much during baking.
- Bake the cookies for 10-15 minutes, or until the edges are just slightly golden. Cool on the baking sheet for 10 minutes, then transfer to a wire rack and cool completely.
Video

