
These Witch Hat Cupcakes are the ultimate spooky treat, perfect for Halloween parties! With a whimsical design and delicious flavor, everyone will love this festive dessert.
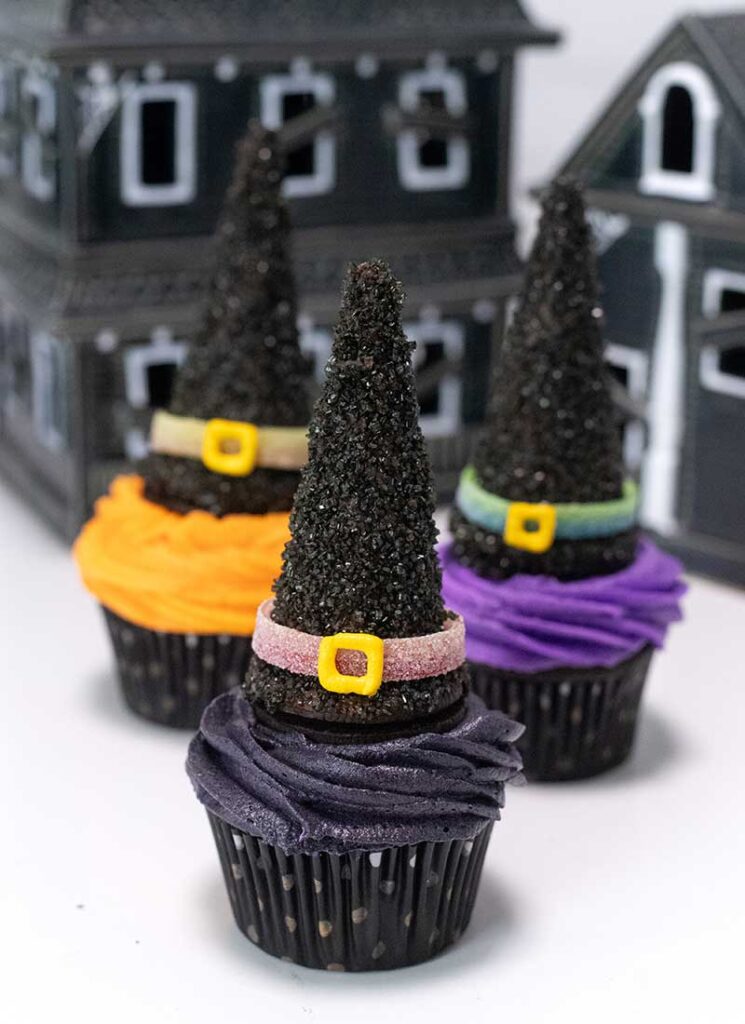
Transform your Halloween dessert table with these enchanting witch-themed cupcakes! Moist, tender chocolate cupcakes are combined with a rich, creamy buttercream frosting and crowned with an edible witch hat made from a chocolate-covered cone. These Halloween cupcakes taste incredible and bring a touch of spooky charm to any gathering.
The homemade buttercream frosting adds a luxurious touch, while the playful witch hats–crafted from Oreo cookies and mini ice cream cones–make this an unforgettable treat. Add this recipe to your easy Halloween cupcake ideas for your next holiday party or group gathering! For more fun Halloween cupcake designs, try my Pumpkin Spice Cupcakes, Glow in the Dark Cupcakes, or Fuzzy Tarantula Cupcakes.
Why You’ll Love These Witch Hat Cupcakes
- Festive & Fun: These spooky cupcakes are perfect for Halloween parties! The whimsical witch hat toppers will make a statement everyone will love.
- Homemade Buttercream: The frosting is rich and smooth and tastes better than storebought. You can also customize it with your favorite colors.
- Easy to Make: With simple ingredients and clear, step-by-step instructions, anyone can whip up these buttercream Halloween cupcakes. They’re a great recipe to make with kids, too!
Key Ingredients for Witch Hat Cupcakes
- All-Purpose Flour: This provides structure to the cupcakes. Sift before measuring for a light, fluffy texture.
- Granulated Sugar: Sweeteners the cupcake batter and helps create a tender crumb. Alternatively, you can use coconut sugar for a slight caramel undertone.
- Cocoa Powder: Adds a deep chocolate cupcake flavor. Use unsweetened cocoa powder. Dutch-process or dark chocolate cocoa can be used for a richer taste.
- Milk: Adds moisture to the cupcake batter. Use whole milk for the richest flavor and texture or substitute with your milk of choice.
- Vegetable Oil: Keeps the cupcakes moist. You can use canola oil or melted coconut oil as an alternative.
- Large Egg: Binds the ingredients together. Bring them to room temperature before mixing.
- Vanilla Extract: Pure vanilla extract adds a subtle rich flavor to the cupcakes and the frosting. For an extra punch, use vanilla bean paste instead.
- Unsalted Butter: Forms the base of the buttercream. Bring to room temperature before mixing.
- Confectioner’s Sugar: Sweetens and thickens the buttercream. Sift before adding for a smooth texture.
- Food Coloring: Orange, green, yellow, and purple food coloring creates festive decorating colors. You can use natural food colorings if preferred.
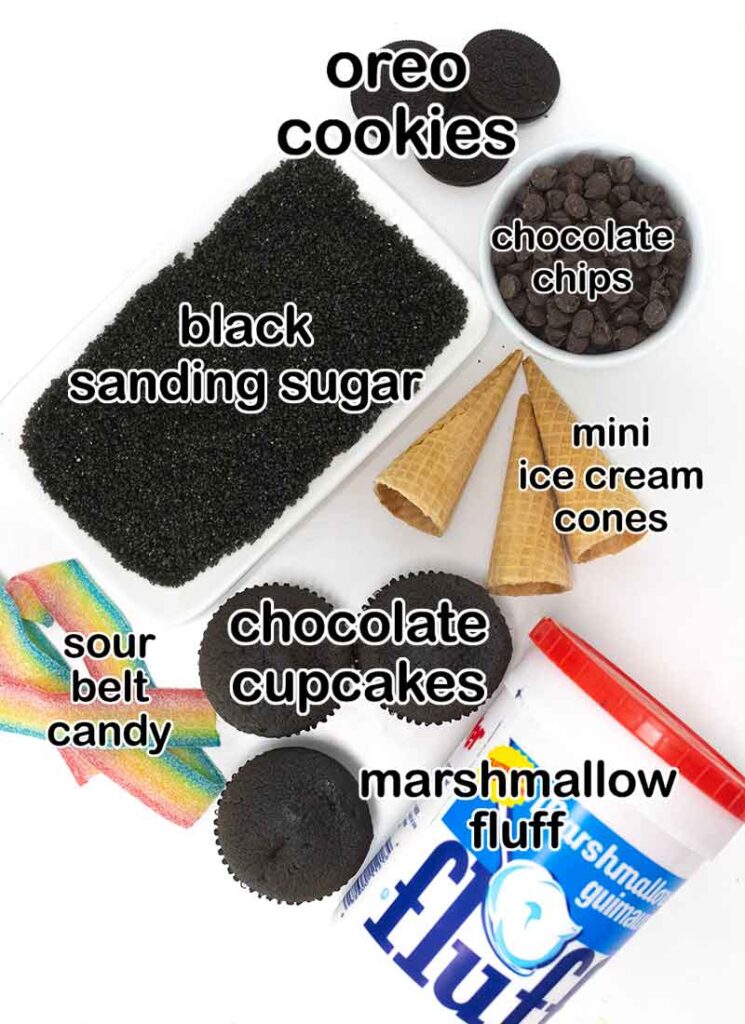
- Marshmallow Fluff: Is spooned into the top of the cupcakes, adding a light and sweet surprise filling.
- Chocolate Chips: Melted chocolate chips coat the witch hat cones and make the black sanding sugar stick. Use dark or semi-sweet based on your preferences.
- Black Sanding Sugar: Adds edible sparkle and texture to the hats. Find it in specialty baking stores or online.
- Oreo Cookies: These serve as the base for the witch hats. For a fun flavor twist, swap in your favorite Oreo cookie variety.
- Mini Ice Cream Cones: Forms the cone of the hats. Use regular sugar cones for the easiest decorating, or swap with chocolate or flavored cones as desired.
- Sour Belt Candy: This candy is used to create the hats’ bands. For variety, you can use different-colored candies or simply icing.
Helpful Tools
- Electric Mixer
- Cupcake Pan
- Cupcake Liners
- Piping Bags
- Large Star-Shaped Piping Tip
- Small Round Piping Tip
- Wire Cooling Rack
How to Make Witch Hat Cupcakes
Step 1: Prepare Cupcakes
Place the flour, sugar, cocoa powder, baking powder, baking soda, and salt in a large bowl and mix until well combined. Add the milk, vegetable oil, egg, and vanilla extract and mix with an electric mixer until combined. Slowly add the boiling water and mix until well combined.
Step 2: Bake Cupcakes
Divide the batter evenly between two cupcake pans, using liners for easier removal, and bake at 350ºF for 15-20 minutes, or until a skewer inserted into the centers comes out clean. Cool for 10 minutes in the pan, then transfer the cupcakes to a wire rack and cool completely.
Step 3: Prepare Buttercream Frosting
Beat the butter with an electric mixer until pale and fluffy. Add the vanilla extract and powdered sugar one cup at a time, beating with each addition.
Step 4: Dye Frosting
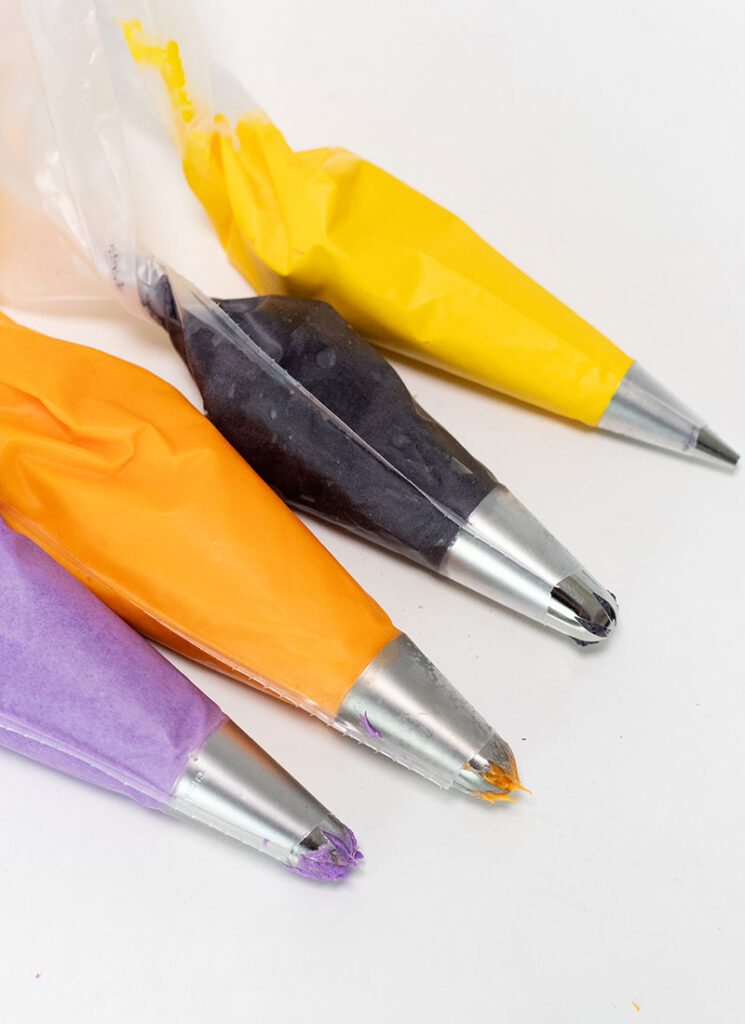
Dye about ¼ cup of the buttercream yellow with the yellow food coloring. Place the yellow buttercream into a piping bag fitted with a small, round piping tip. Divide the remaining buttercream into 3 bowls. Dye one bowl of buttercream orange, another green, and the last purple. Place each color into a piping bag fitted with large, star-shaped piping tips.
Step 5: Prepare Cookie Base
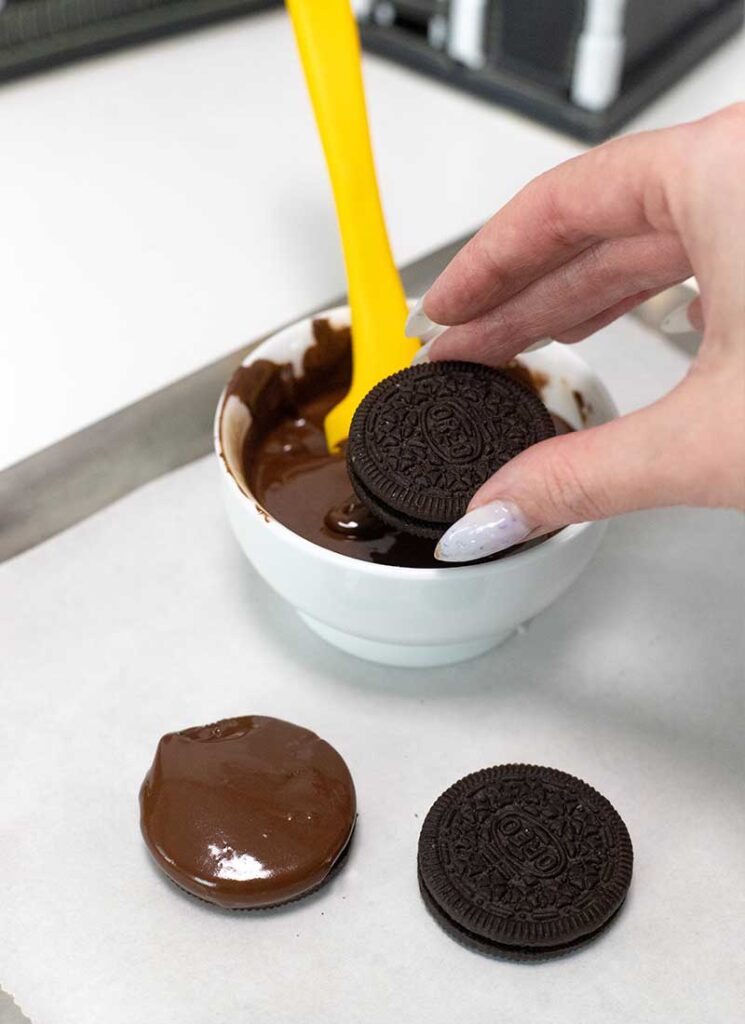
One at a time, dip the top of one Oreo cookie in the melted chocolate chips so that the entire top surface is covered. Return the cookie to the plate, chocolate side up. Lay the Oreo cookies flat on a plate. Set aside.

Step 6: Prepare Cones
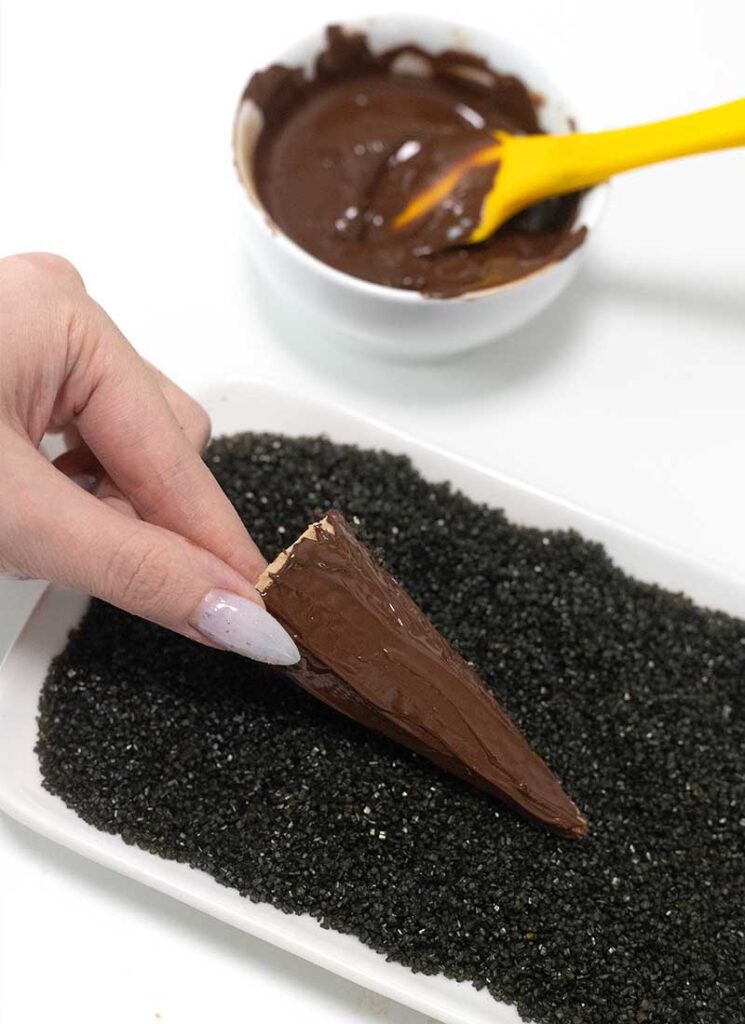
Pour the black sanding sugar into a large, shallow bowl or onto a baking sheet. Pick up one ice cream cone, and hold it by placing two fingers inside the cone to prevent the sides from becoming smushed! Roll the sides of the cone in the melted chocolate, allowing any excess chocolate to drip off. If there is too much chocolate on the cone, the sugar will have trouble sticking.
Step 7: Add Sanding Sugar
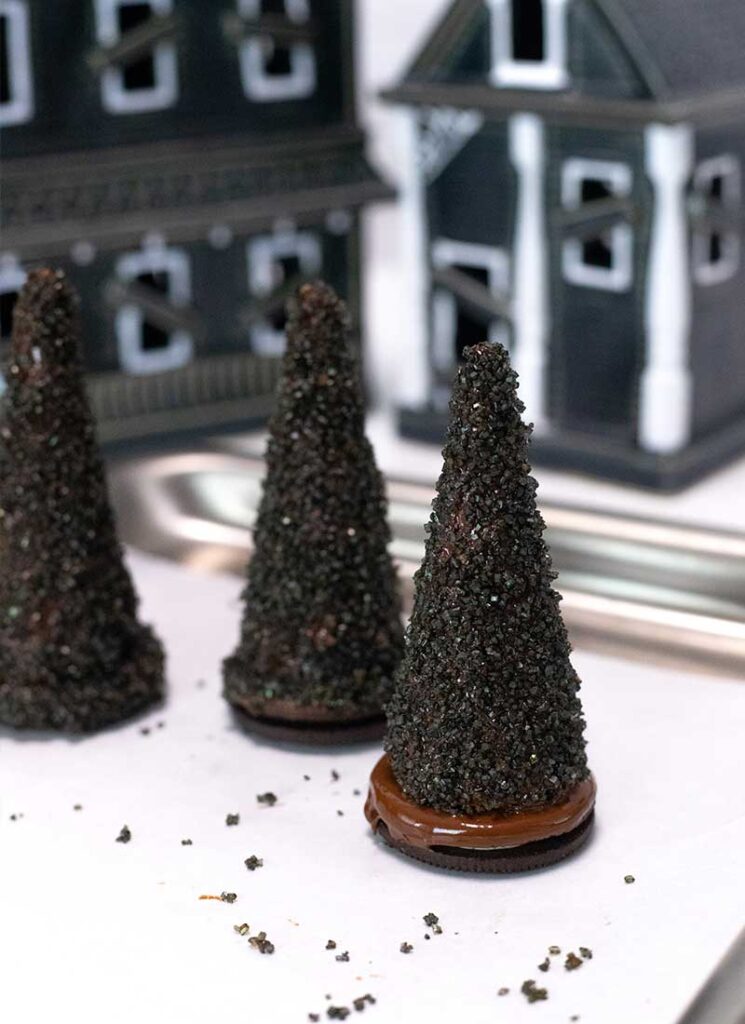
After dipping each cone, roll it in the sanding sugar, ensuring it is evenly coated. Place the cone on top of the chocolate-dipped cookie. Sprinkle more sanding sugar on the cone so that any excess chocolate is covered in sugar.


Step 8: Add Sour Belt
Wrap a sour belt around the base of each cone, using some extra melted chocolate to seal it closed. Set the hat on a tray and repeat to make the remaining 11 hats. Chill the hats in the fridge for about 20 minutes, or until the chocolate has hardened.
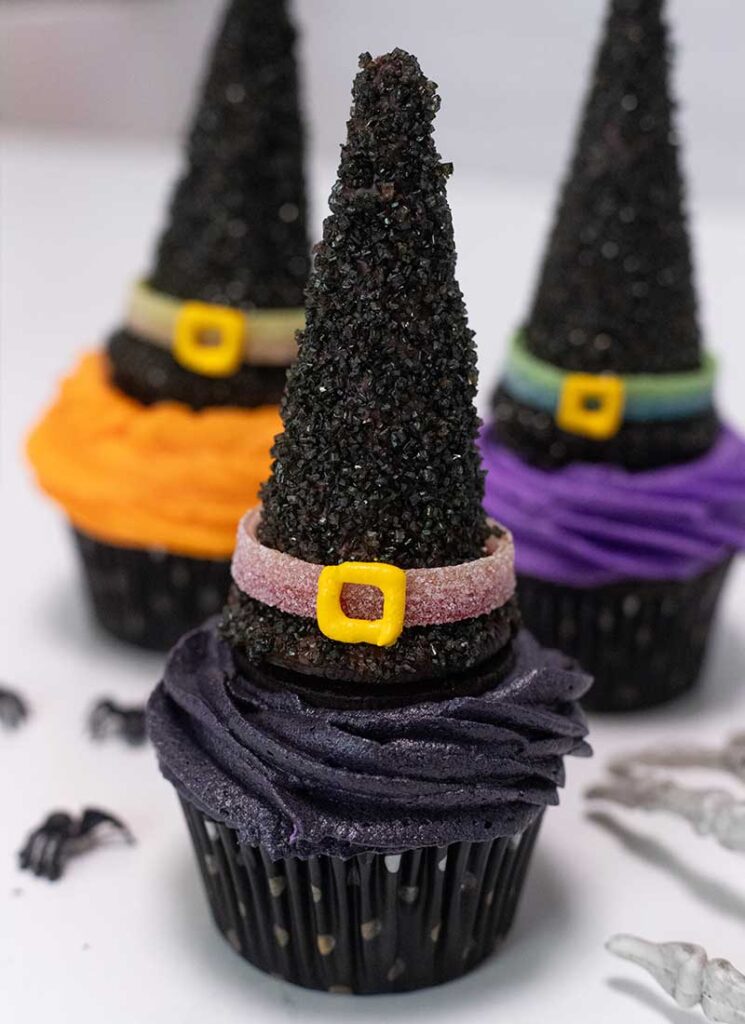
Step 9: Decorate
Once the chocolate has hardened, use the yellow buttercream to pipe a buckle onto each hat. Set aside. Use a small spoon to remove the center of each cupcake. Spoon some marshmallow fluff into each cupcake. You can place the marshmallow fluff into a piping bag to make this process much easier! Pipe a swirl of purple, green, or orange buttercream onto the cupcakes. Top with a hat and enjoy!


Tips for Making Perfect Witches Hat Cupcakes
- For the smoothest texture, ensure the butter, eggs, and milk are at room temperature before mixing the cupcake batter.
- Avoid overmixing the cupcake batter. Doing so can result in dense cupcakes; stir until just combined.
- Chill the prepared witch hats in the refrigerator for at least 10 minutes to set the chocolate before placing them on the cupcakes for easy decorating.
- Use different food coloring combinations if desired to match your party theme.
- To add more decoration, choose cupcake liners with designs or different colors.
Serving Suggestions
These festive cupcakes are perfect for Halloween parties, school events, or spooky-themed birthdays. Serve them alongside other Halloween treats for a fully themed dessert table.
Storage Directions
At room temperature – Store leftovers from this Halloween cupcakes easy recipe in an airtight container at room temperature for up to 5 days.
In the refrigerator – If your kitchen is warm, store the cupcakes in an airtight container for up to 1 week. Bring to room temperature before serving.
FAQ
Can I make this recipe a cake instead of cupcakes?
Yes! You can use this same recipe to make a witch hat cake instead. Follow the recipe as outlined but bake the batter in two greased and floured 8-inch round pans at 350ºF for 25-30 minutes. Then frost the cooled cake with butter and decorate the top with witch hats!
More Fun Halloween Recipes to Try!
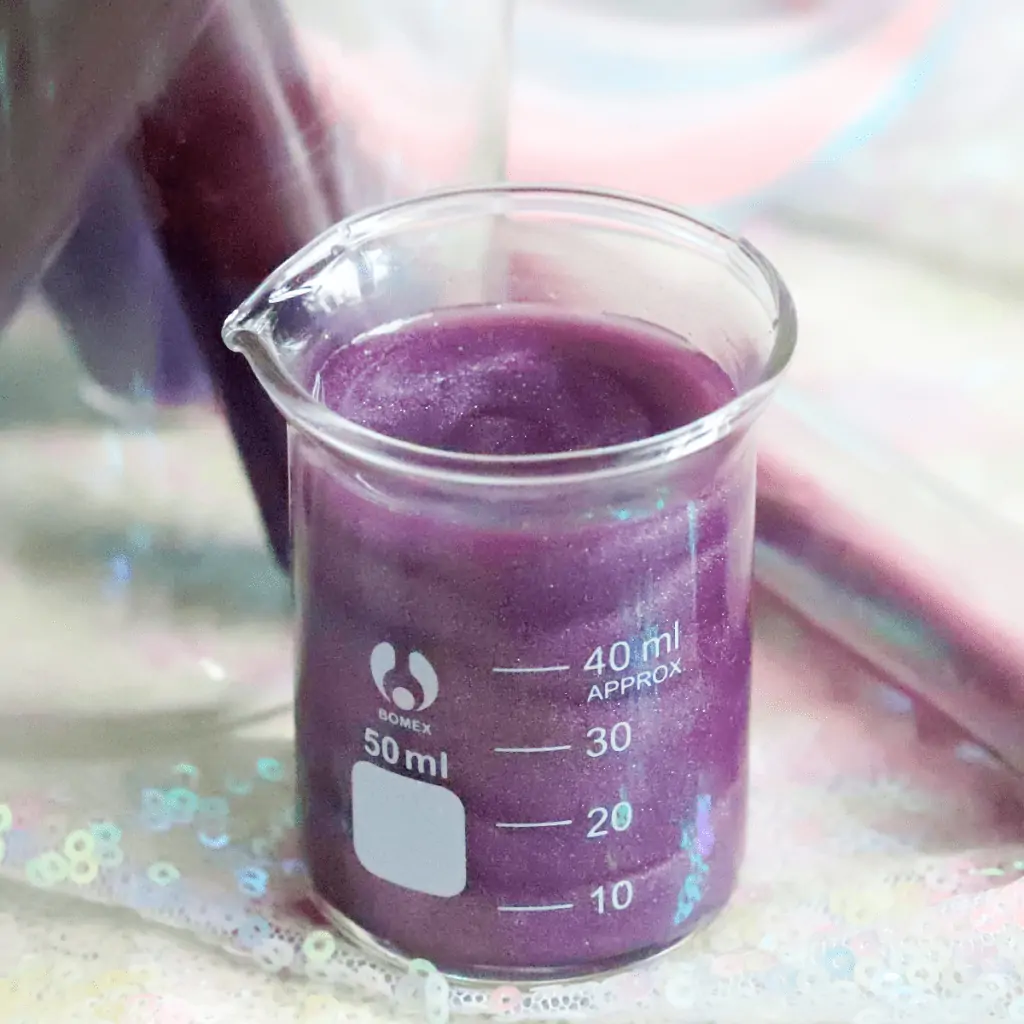
This fruity, sparkly punch turns into unicorn blood when served in test tubes!
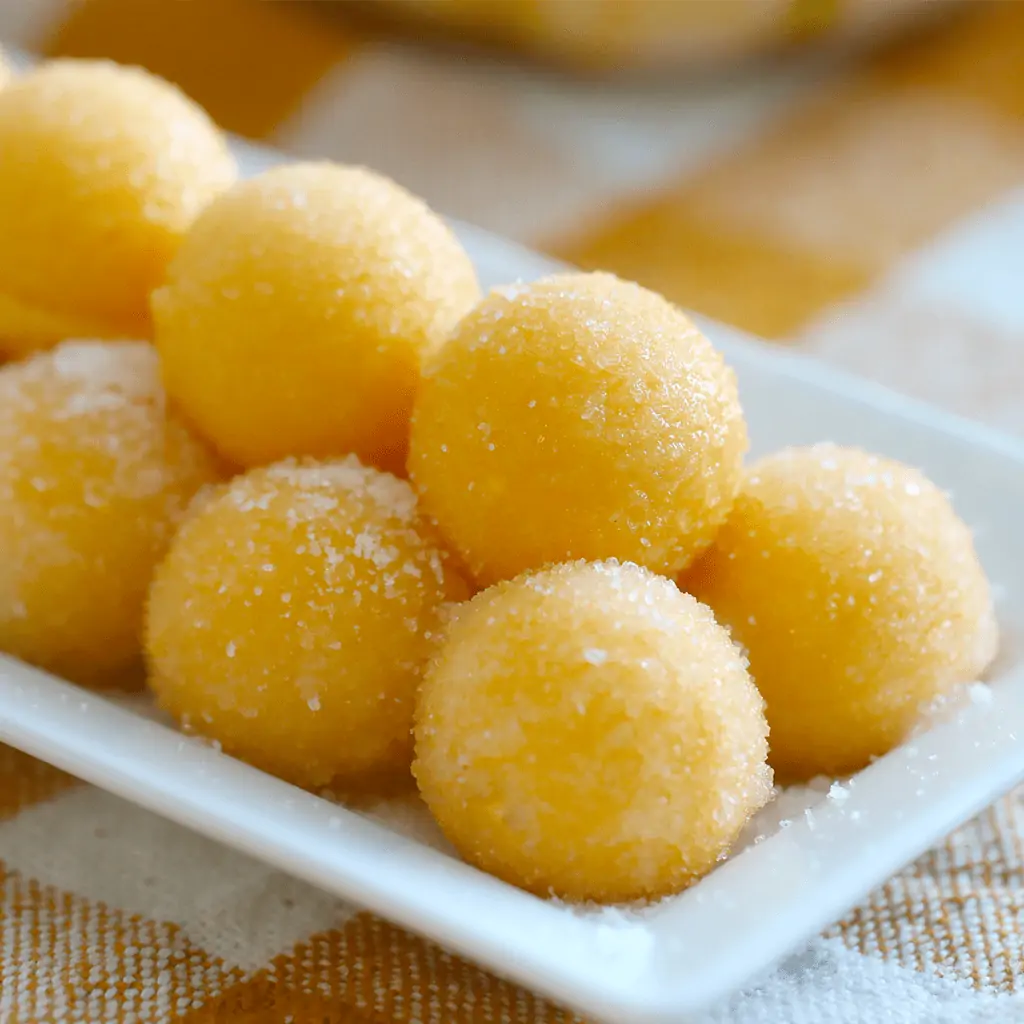
Bouncy, vibrant gummies with fresh pumpkin and rolled in sugar.
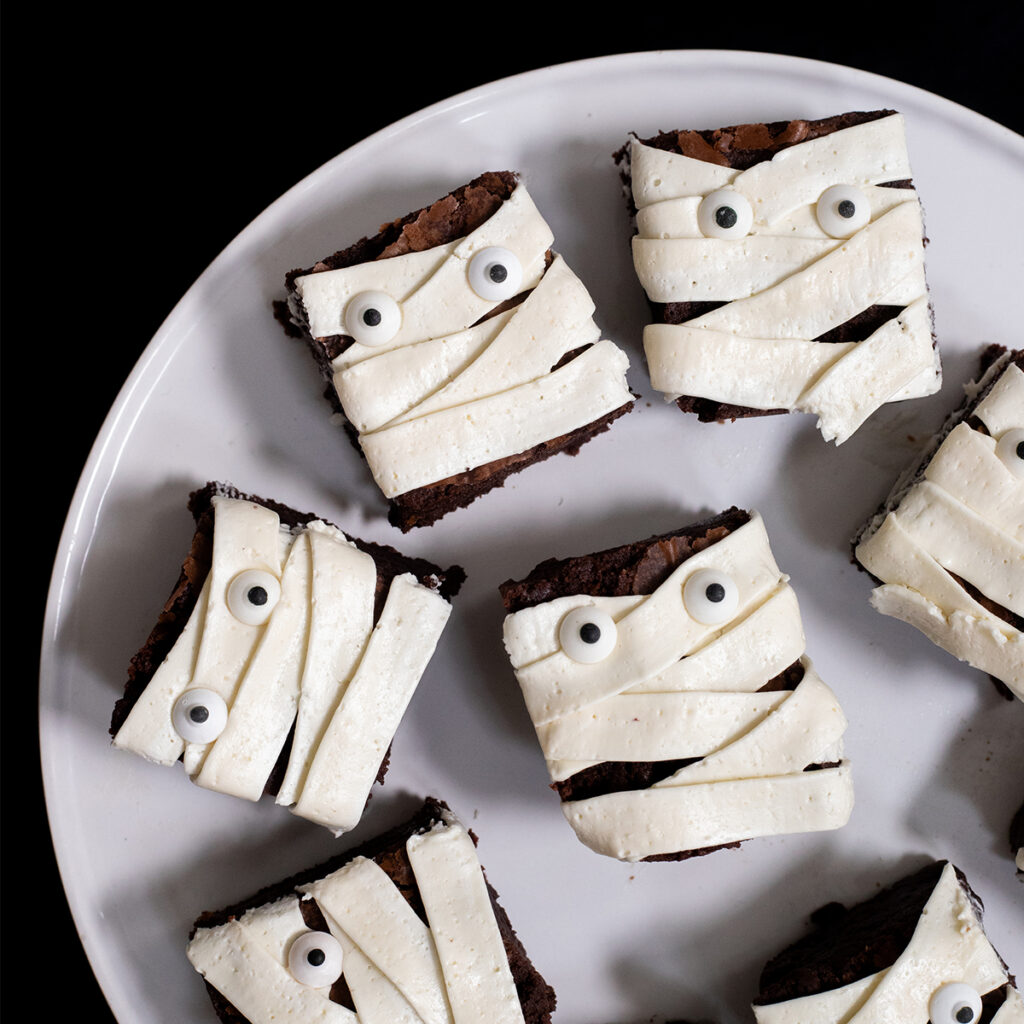
The most delicious – and spookiest – brownies you’ll ever taste! Vanilla buttercream turns classic brownies into spooky little mummies.
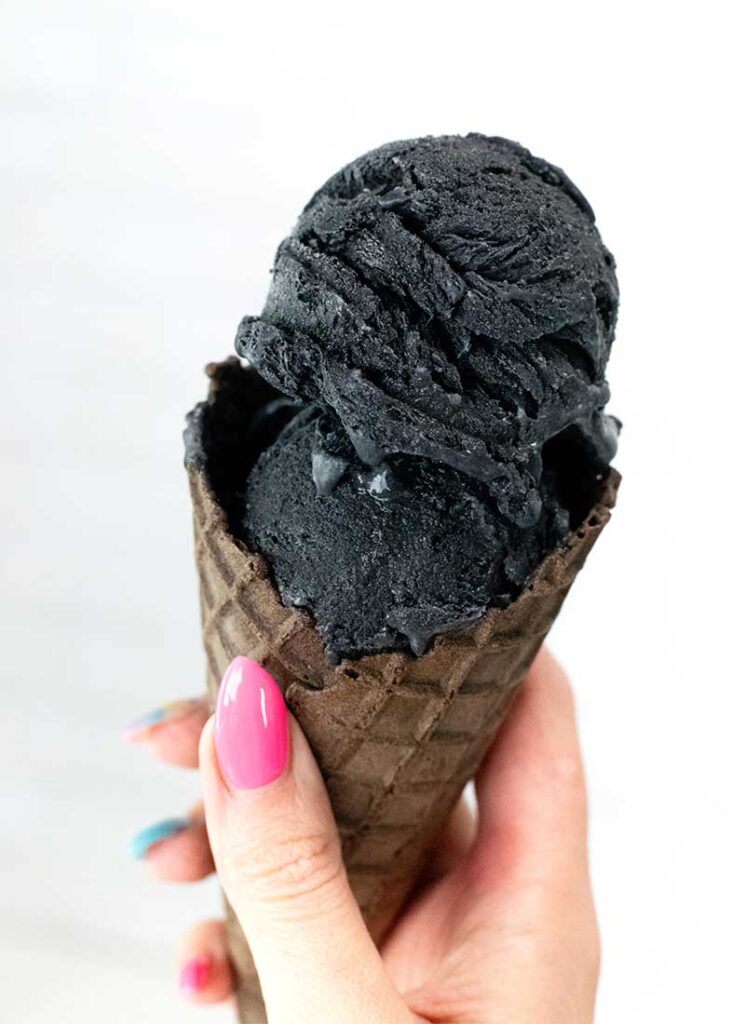
Creamy vanilla ice cream that is as dark as the Halloween night sky!
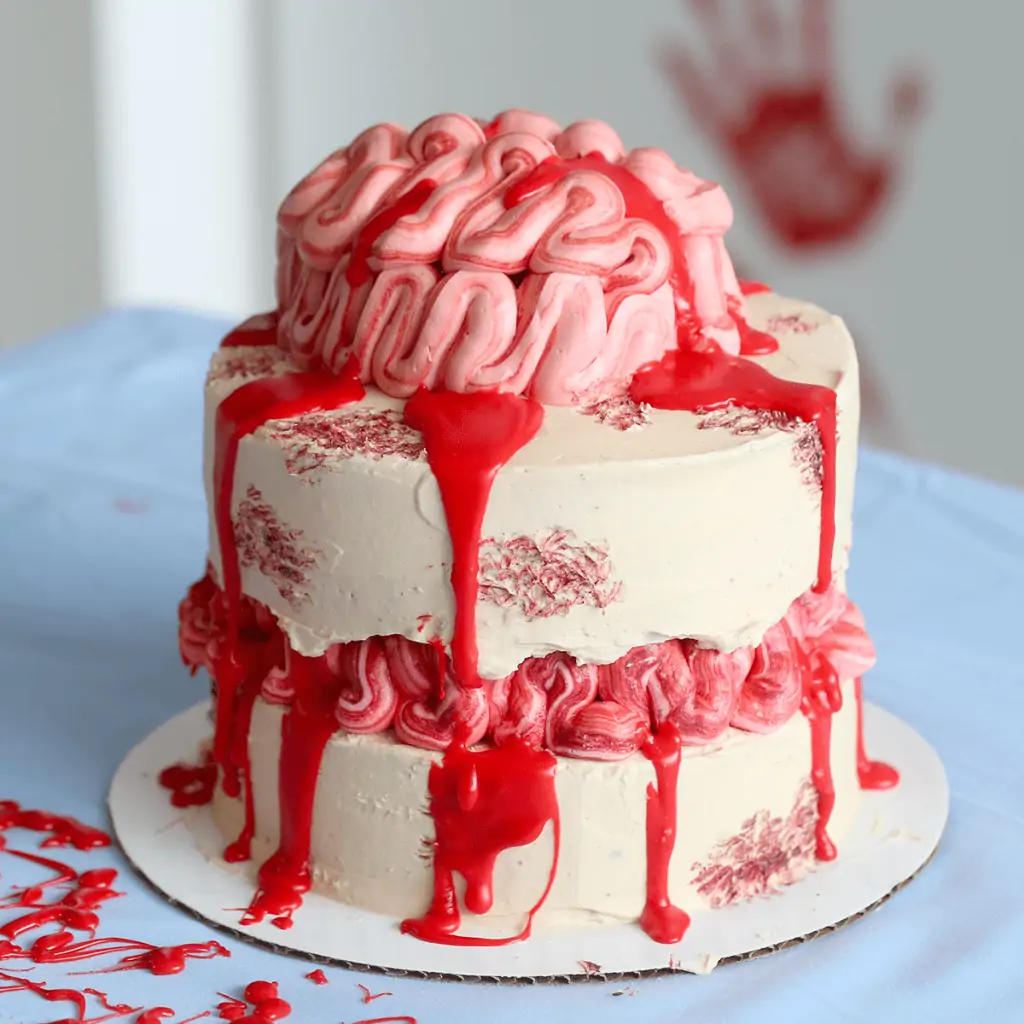
Brains ooze out of the sides of this spooky take on a trendy Fault Line Cake!

Witch Hat Cupcakes
These festive Witch Hat Cupcakes will enchant your Halloween parties! Delight in moist chocolate cupcakes topped with buttercream and spooky chocolate hats.
Equipment
Ingredients
Cupcake batter:
- 1 cup all-purpose flour
- 1 cup sugar
- ¼ cup + 2 tbsp cocoa powder
- 1 tsp baking powder
- 3/4 tsp baking soda
- 1/2 tsp salt
- 1/2 cup milk
- 1/4 cup vegetable oil
- 1 large egg
- 1 tsp vanilla extract
- 1/2 cup boiling water
Buttercream:
- 2 cups unsalted butter room temperature
- 1 tsp vanilla extract or seeds from 1 vanilla bean
- 5 cups powdered sugar
- food coloring orange, green, yellow and purple
- 2 cups marshmallow fluff
Witch Hats:
- 2 ½ cups chocolate chips melted
- 1 cup black sanding sugar
- 12 oreo cookies
- 12 mini ice cream cones
- sour belt candy
Instructions
Bake the cupcakes:
- Preheat the oven to 350F.
- Place the flour, sugar, cocoa powder, baking powder, baking soda and salt in a large bowl and mix together.
- Add the milk, vegetable oil, egg and vanilla extract and mix with an electric mixer until combined.
- Slowly add the boiling water and mix until well combined.
- Divide the batter evenly between two cupcake pans and bake for 15-20 minutes, until a skewer inserted into the centers comes out clean. Cool for 10 minutes in the pan, then transfer the cupcakes to a wire rack and cool completely.
Make the buttercream:
- Beat the butter with an electric mixer until pale and fluffy. Add the vanilla extract and powdered sugar one cup at a time, beating with each addition.
- Dye about ¼ cup of the buttercream yellow with the yellow food coloring. Place the yellow buttercream into a piping bag fitted with a small, round piping tip.
- Divide the remaining buttercream into 3 bowls. Dye the buttercream orange, green and purple and place it into piping bags fitted with large, star-shaped piping tips.
Make the hats:
- Pour the black sanding sugar into a large, shallow bowl or onto a baking sheet. Lay the oreo cookies flat on a plate. Set aside.
- Make one hat at a time by dipping the top of one oreo cookie in the melted chocolate chips, so that the entire top surface of the cookie is covered. Return the cookie to the plate, chocolate side up.
- Pick up one ice cream cone, holding it by placing two fingers inside the cone – this is so the sides don’t get smushed! Roll the sides of the cone in the melted chocolate, allowing any excess chocolate to drip off. If there is too much chocolate on the cone, the sugar will have trouble sticking.
- Immediately roll the cone in the sanding sugar, making sure that it is evenly coated. Place the cone on top of the chocolate-dipped cookie. Sprinkle some more sanding sugar on top of the cookie so that any excess chocolate is covered in sugar. Wrap a sour belt around the base of the cone, using some extra chocolate to seal it closed. Set the hat aside on a tray and repeat to make the remaining 11 hats.
- Chill the hats in the fridge for about 20 minutes, or until the chocolate has hardened.
- Use the yellow buttercream to pipe a buckle onto each hat. Set aside.
Decorate the cupcakes:
- Use a small spoon to remove the center of each cupcake. Spoon some marshmallow fluff into each cupcake. You can place the marshmallow fluff into a piping bag to make this process much easier!
- Pipe a swirl of purple, green or orange buttercream onto the cupcakes. Top with a hat and enjoy!
Notes
Storage Directions
At room temperature – Store leftovers from this Halloween cupcakes easy recipe in an airtight container at room temperature for up to 5 days.
In the refrigerator – If your kitchen is warm, store the cupcakes in an airtight container for up to 1 week. Bring to room temperature before serving.
Recipe Success Tips
- For the smoothest texture, ensure the butter, eggs, and milk are at room temperature before mixing the cupcake batter.
- Avoid overmixing the cupcake batter. Doing so can result in dense cupcakes; stir until just combined.
- Chill the prepared witch hats in the refrigerator for at least 10 minutes to set the chocolate before placing them on the cupcakes for easy decorating.
- Use different food coloring combinations if desired to match your party theme.
- To add more decoration, choose cupcake liners with designs or different colors.
Tried this recipe?Let us know how it was!

Hi everyone! My name is Cayla Gallagher and I’m the creator of pankobunny!
I’m In The Mood For:
@pankobunny
This error message is only visible to WordPress admins
Error: Invalid Feed ID.