Rilakkuma Swimming Pool Jellies
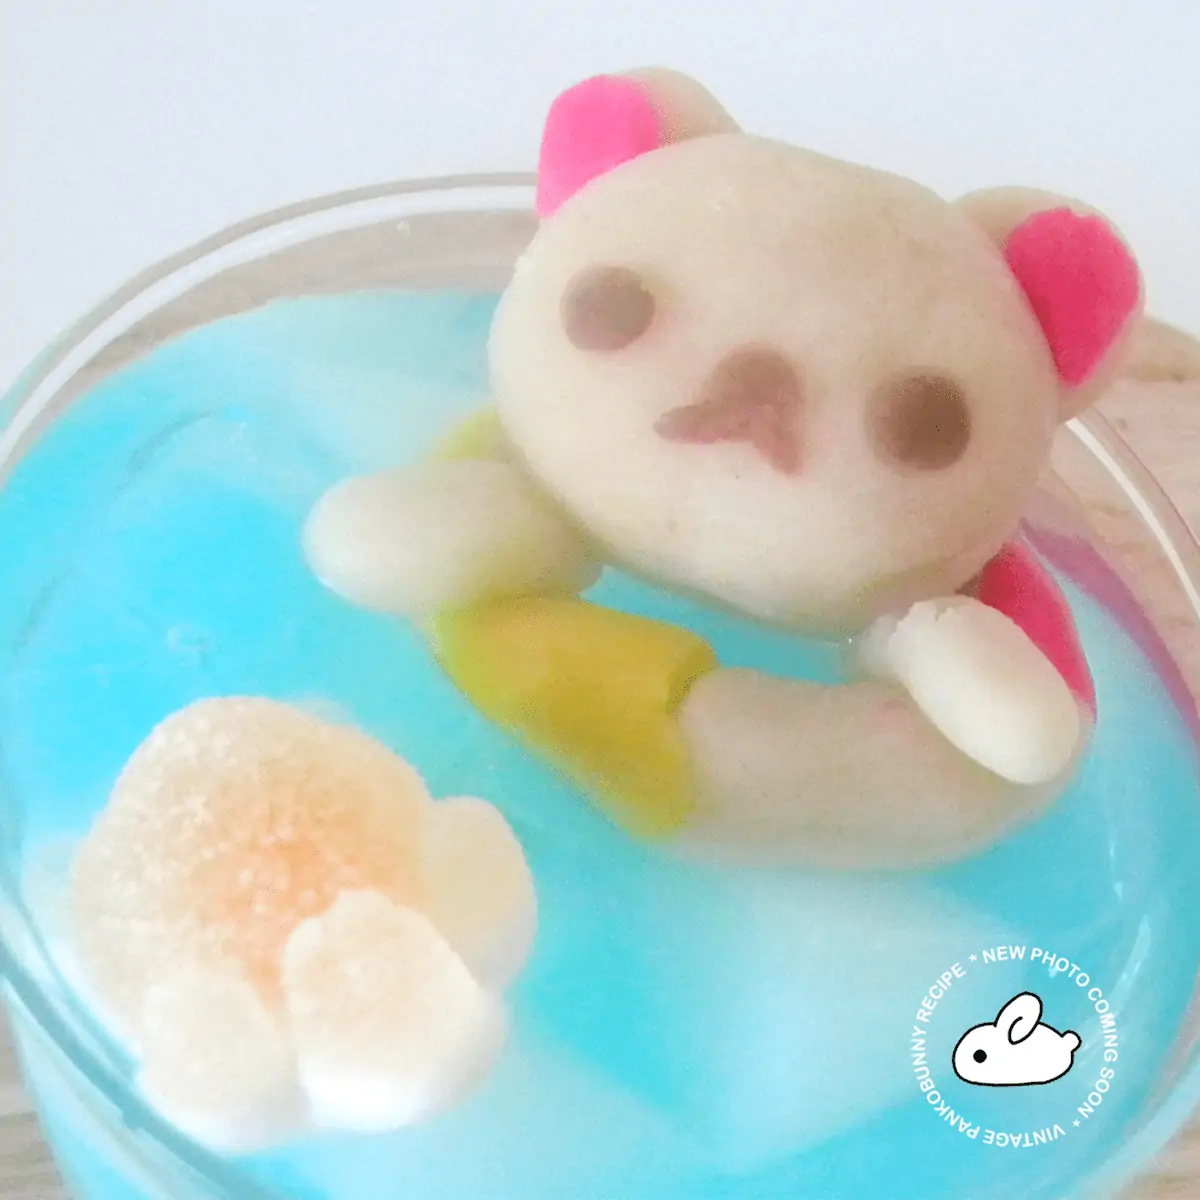
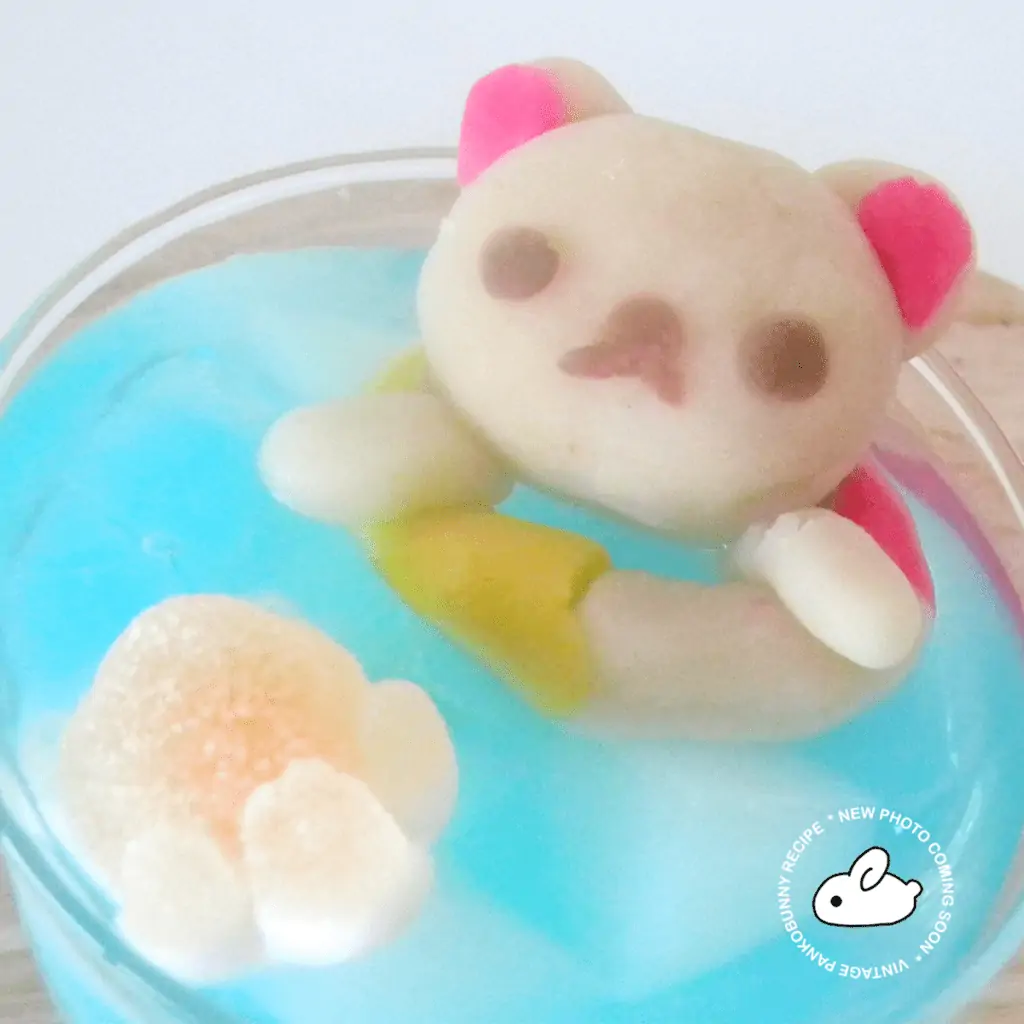
If you don’t have access to a swimming pool or a beach this summer, bring them to your table with these swimming pools in a glass! There are two textures of jelly which make these extra refreshing, and the sweetness from the bears complements them deliciously . This is the same nerikiri sweet bean dough that I used in my Edible Brain and Edible Snow Globes recipes, and don’t be nervous about trying it out – you’ll get the hang of it in no time!! If you don’t have access to these Japanese drinks, feel free to use any kind of blue-coloured juice for the blueberry Ramune, use milk instead of the Calpis water, and Sprite or any clear soda in place of the clear Ramune. Making the little Rilakkuma faces can be tricky, but if you have a picture next to you, it is totally do-able!
Rilakkuma Swimming Pool Jellies
Ingredients
- 100 g shiroan paste white kidney bean paste
- 1 tsp shiratamako rice flour
- 2 tsp water
- pink food coloring
- yellow food coloring
- cocoa powder
- your desired gummies
Blue jelly
- 250 ml blueberry-flavored Ramune a popular Japanese soft drink, or any blue-colored drink
- 2 g powdered kanten/agar
White jelly
- 250 ml Calpis water or Calpis soda
- 2 g powdered kanten/agar
Clear jelly
- 300 ml clear Ramune or Sprite
- 2 tsp gelatin
Instructions
Making the jellies
- To make the blue jelly, pour the blueberry-flavored Ramune into a pot and set to medium heat. Sprinkle in and dissolve the kanten, then pour the liquid into a small plastic container. Place in the fridge until it is fully set, about 30 minutes.
- Follow the same steps to make the white jelly, and pour into a small plastic container as well. Place this in the fridge until fully set.
Making the Rilakkumas
- Gradually add the water to the shiratamako, dissolving it and creating a watery white liquid.
- Then add this liquid to the shiroan paste (which is a sweet, white kidney bean paste) in a small pot, and mix very well with a rubber spatula until the liquid is completely incorporated. Place the pot on the stove, and set it on medium-low heat. Keep kneading the dough with the spatula until most of the water has been absorbed, and it no longer has a shine. It should still have a paste-like consistency and hold together well, but feel and look slightly dryer than before. You don’t want to cook it so long that it begins to brown, and remove it immediately from the heat if you notice it browning. On the other hand, if you do not cook it long enough it will be much too sticky to handle.
- Once it has reached this stage, remove it from the heat, and spread the paste evenly along the insides of the pot, for it to cool. Spreading it around ½ to 1 cm thick will allow the paste to cool without drying out too much.
- Once the nerikiri has cooled enough to touch and not burn your hands, scrape it off from the pot with a spatula, and roll it into a ball. If it crumbles and cracks when you are trying to shape it, it has been overcooked, and if it sticks to your hands and is very difficult to shape, it has been undercooked. In both of these instances, I would recommend making a new batch. My first batch did not turn out well at all, but you will quickly get used to the dough and what it should look like. It should feel like a slightly denser version of Play-Doh.
- Divide the dough in half, and set half aside. Use one half for the heads, by dividing the dough in half again, then tearing off small pieces for their ears. Shape them into the Rilakkumas’ heads. With the other ball of dough, tear off a small piece and knead it together with some cocoa powder. Make the eyes, nose and mouth out of the brown dough. Dye a small piece of dough pink, and use this for the ears. Divide the remaining dough into 3 pieces, and dye one pink, one yellow, and leave the remaining piece white. Tear off two pieces of white dough, and one piece of the pink and the yellow dough and connect them end to end. Toll them into a sausage and then shape into a ring to create the life preserver. Repeat to make a second one. Use some remaining white dough to make the arms of the Rilakkumas.
Assembling the jellies
- Once the blue and white jellies have completely set, slice them into any shape you like. I sliced mine into rectangles, then sliced them into thirds.
- Layer them in two glasses so that they look like swimming pools.
- Heat the clear Ramune or Sprite in a pot over medium heat, and sprinkle in and dissolve the gelatin. Allow this mixture to slightly cool, then pour into the two glasses. Place the glasses in the freezer until they are almost fully set.
- Place the life preservers on top of the jellies, and arrange the Rilakkuma’s arms and heads on top. You can also decorate the pool with gummies to look like little pool toys! Then place the jellies back into the freezer to finish setting.
Video

