
Create spooky and delicious Spider Web Cookies for Halloween! These easy-to-make cookies are a fun treat that will add a creepy-crawly twist to your holiday celebrations.
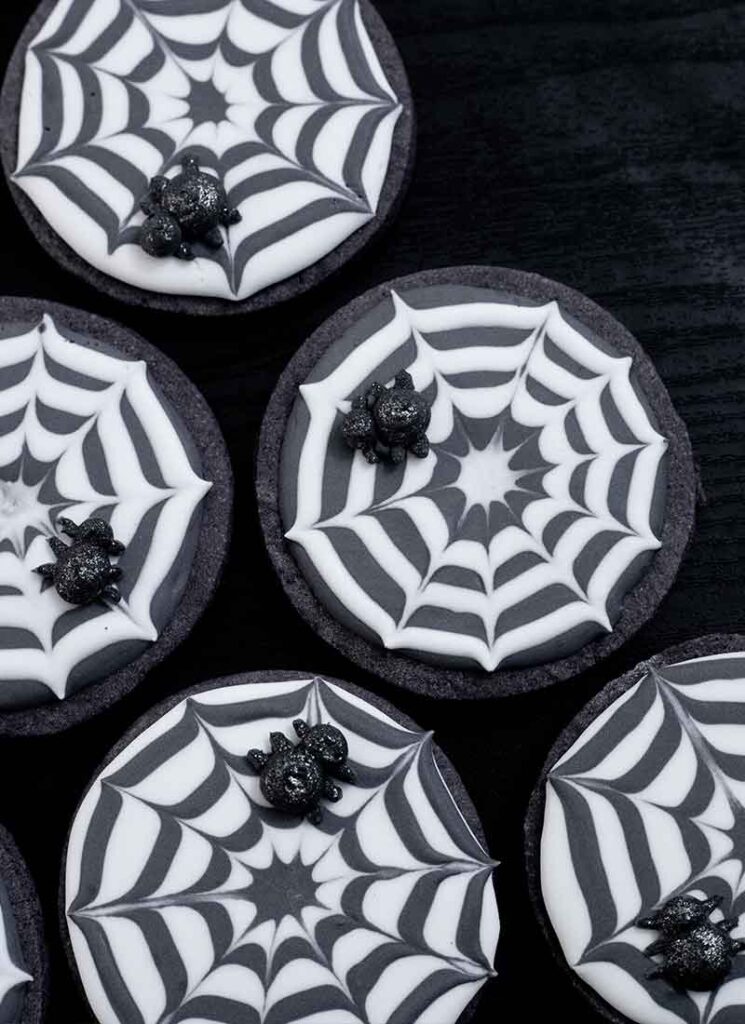
If you’re looking for fun Halloweens sugar cookie ideas, you’ll love these picturesque spider web sugar cookies! Homemade sugar cookies are topped with intricate royal icing webs and edible glitter, and are as fun to make as they are to eat! Perfect for Halloween parties or a spooky night in, these festive treats combine a soft, butter cookie texture with the sweet snap of royal icing that both kids and adults will love.
This recipe guides you through every step to create one dozen freshly baked cookies and stunning spider web designs. Whether you’re a decorating pro or just starting out, the step-by-step guide makes it easy to turn each cookie into a masterpiece! If you’re on the hunt for more Halloween treats, check out my Fuzzy Tarantula Cupcakes, Brain-y Fault Line Cake, or S’mores Marshmallow Ghost Tart.
What are Spider Web cookies?
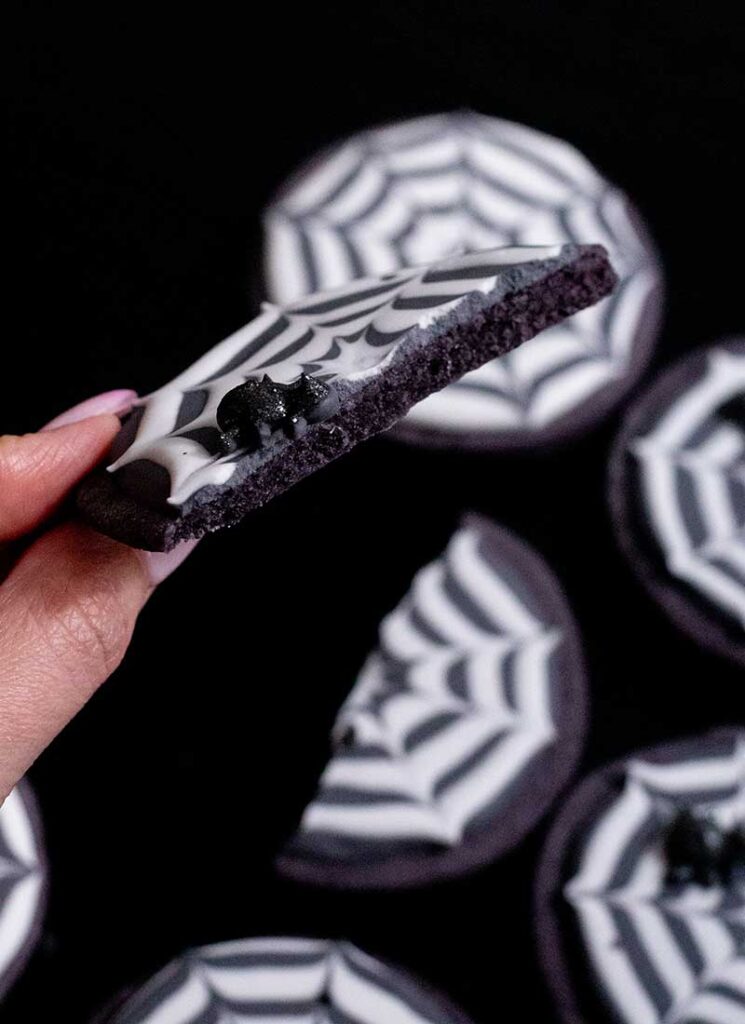
This spider web cookie recipe makes soft, buttery sugar cookies decorated with black royal icing in the shape of spider webs. These Halloween-themed treats start with a classic sugar cookie dough, rolled out into rounds, and baked until firm but tender. The magic of the cookies comes alive with the decoration–using homemade royal icing to transform the cookies into eerie yet elegant spider webs.
Why You’ll Love These Spider Web Cookies
- Easy & Fun to Make: These cookies are both enjoyable to bake and decorate, making them perfect for bakers of all levels.
- Homemade Royal Icing: The smooth, homemade royal icing is a breeze to work with and tastes better than store-bought cookies.
- Kid-Friendly: Decorating these cookies is a fun activity for kids, and they’ll love eating the spooky, glittery treats they’ve helped create.
- Versatile: Customize the design with different colors of icing or edible glitter to suit your Halloween theme or personal style!
Ingredients for Spider Web Cookie
- All-Purpose Flour: The foundation of these cookies provides structure and a tender crumb. Or substitute with gluten-free all-purpose flour to suit dietary needs.
- Unsalted Butter: Use room temperature butter to ensure smooth, even cookie dough.
- Granulated Sugar: Adds the perfect sweetness level for the Halloween sugar cookies. White sugar helps achieve a crisp edge while keeping the centers soft.
- Large Egg: Use a large egg to add richness and help bind the other ingredients together.
- Milk: A small amount helps bind the dough to create a smooth texture. Whole milk works best or use your preferred type.
- Vanilla Extract: Pure vanilla extract enhances the flavor of the Halloween cookies with a subtle sweetness and caramel-like undertones.
- Food Coloring: You will need black and red food coloring to create the striking spider web design on the cookies. Gel food coloring is preferred for its intense color and minimal impact on icing consistency.
- Meringue Powder: Stabilizes the royal icing, making it easy to pipe intricate designs. Look for it in the baking aisle or online.
- Cream of Tartar: Helps achieve a stable, glossy finish in the icing. Find it in the spice or baking aisle.
- Powdered Sugar: Used to create smooth, silky icing perfect for decorating. Sift before use to remove any lumps for a flawless finish.
- Black Edible Glitter: Adds a magical sparkly touch that makes the cookies stand out. Find in specialty baking stores or online.
Helpful Tools
- Electric Mixer
- Rolling Pin
- Round Cookie Cutter
- Piping Bags
- Small Round Piping Tips
- Parchment Paper
- Cooling Rack
How to Make Spider Web Cookies
Step 1: Prepare Cookie Dough
Mix the flour, salt, and baking powder in a bowl. In a separate bowl, cream the butter and sugar with an electric mixer until it becomes light and fluffy. Add the milk, egg, vanilla, and several drops of black food coloring and mix well. Slowly add the dry ingredients and mix until just combined. Shape the dough into a ball, wrap it in plastic wrap and chill it in the fridge for 1 hour.

Step 2: Bake Cookies
After the dough has chilled, roll it on a floured surface until ¼-inch thick. Use a 3” round cookie cutter to cut out the cookies and place them on a baking sheet lined with parchment paper. Bake the cookies at 350°F for 10 minutes, until the edges start to brown.

Step 3: Flatten Cookies
Once the cookies are removed from the oven, place another sheet of parchment paper on top of the cookies, followed by another baking sheet. Press down firmly. This will flatten any tops of cookies that have risen and ensure that the tops are smooth and flat. Remove the additional baking sheet and parchment paper and cool the cookies completely.
Step 4: Prepare Icing
While the cookies cool, prepare the royal icing. Pour the warm water into a large bowl. Add the meringue powder and whisk for a couple of seconds until frothy. Add the cream of tartar and whisk again. Add the powdered sugar all at once and using an electric mixer, mix on low speed for 10 minutes. The icing should stay on the surface for 5-7 seconds when drizzled. Add the vanilla extract and mix well.
Step 5: Dye Icing
Divide the icing into 2 bowls. Leave one bowl white and dye the other bowl black. Place the icing into piping bags fitted with small, round piping tips.
Step 6: Decorate Cookies
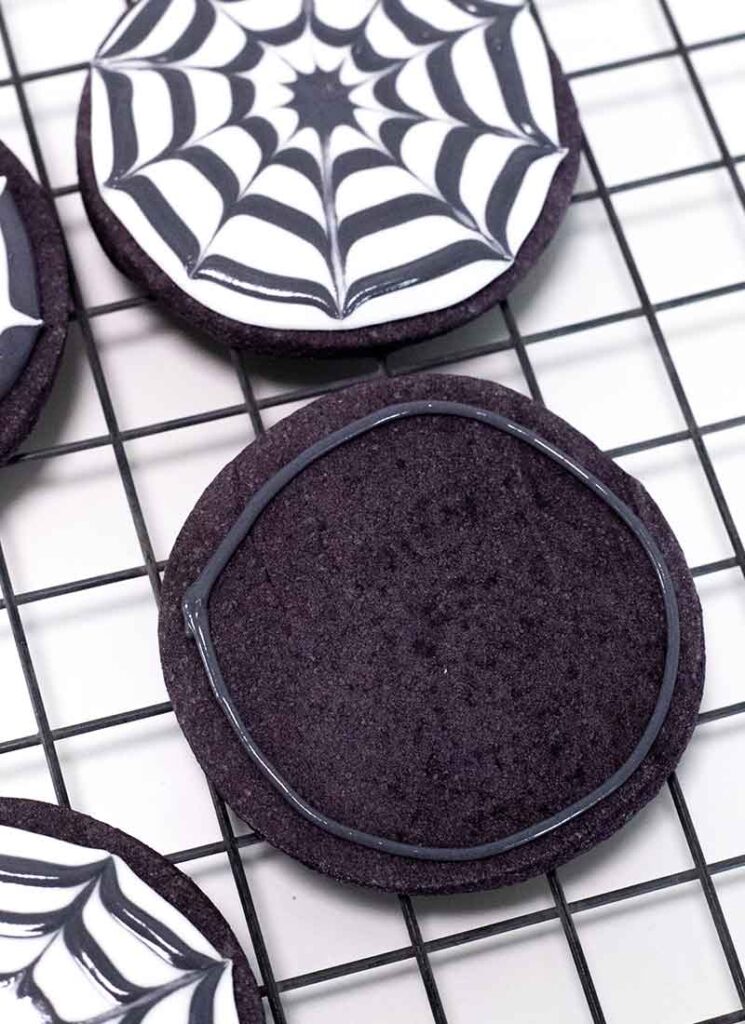
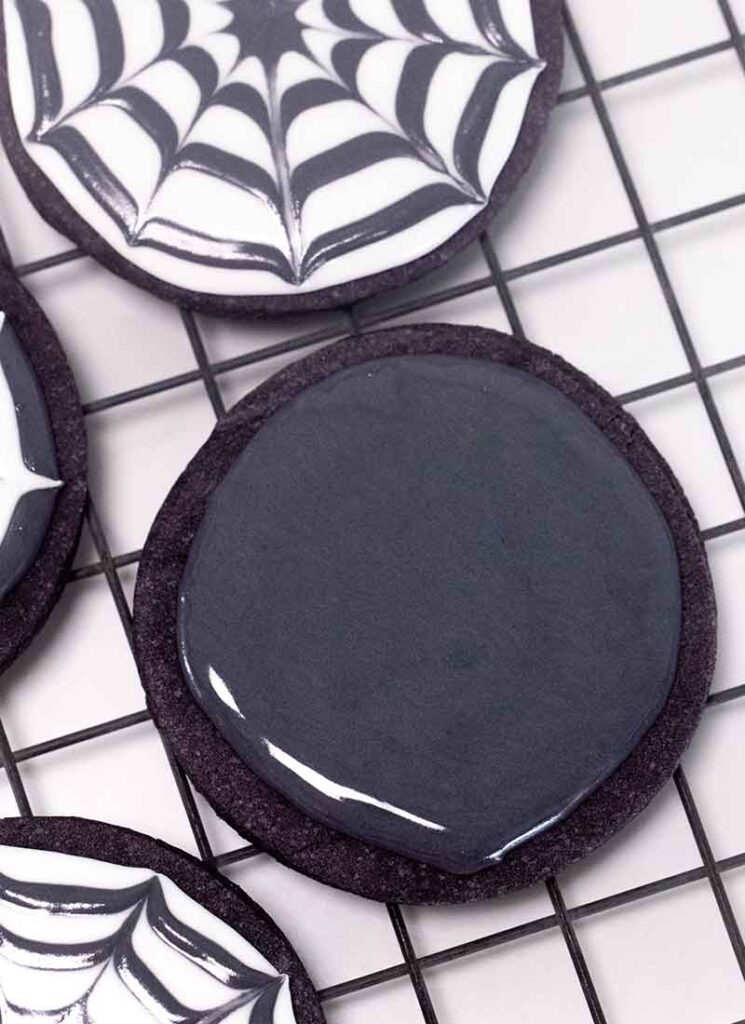
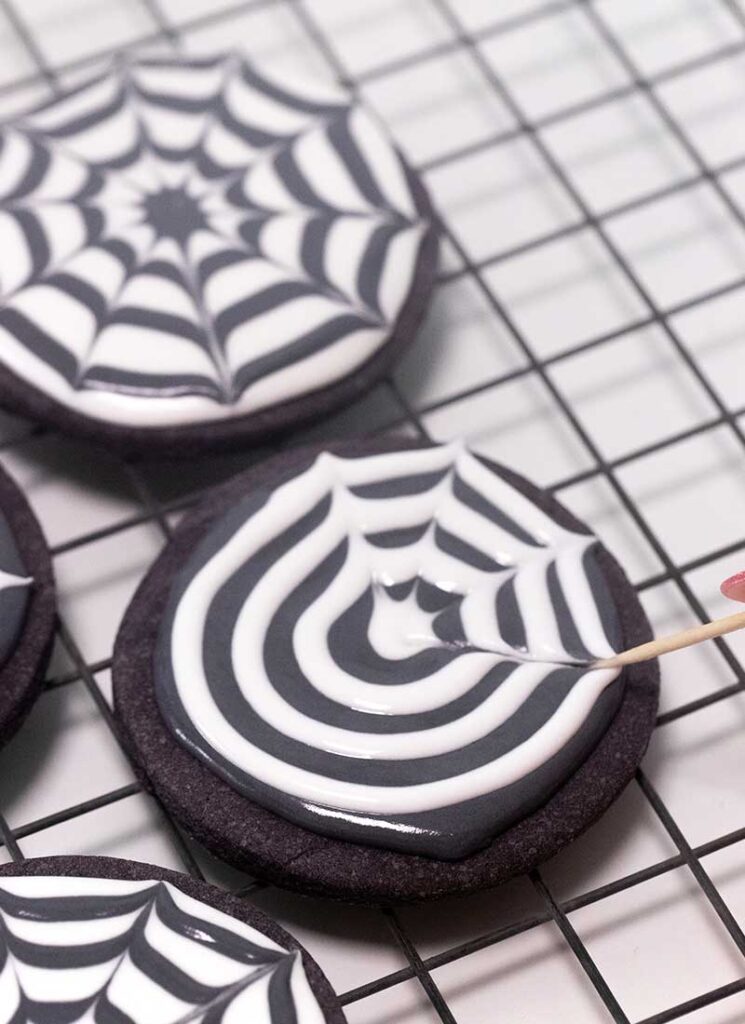
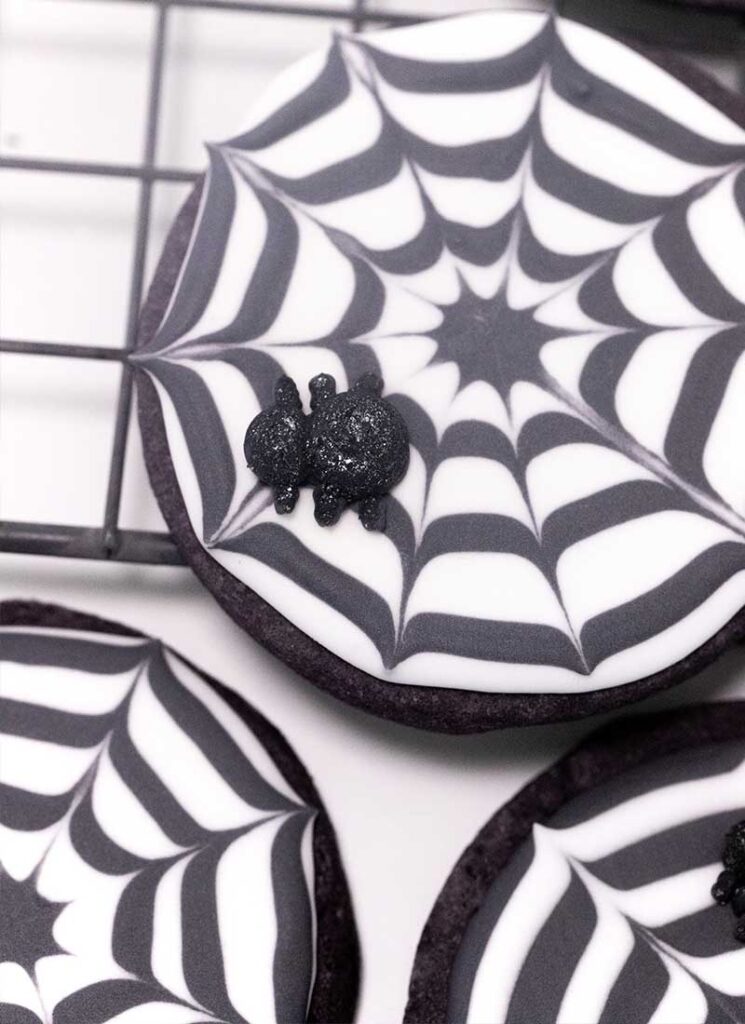
Once the icing is ready, decorate the cookies. Working with one cookie at a time, pipe an outer circle of black icing onto the cookie, just slightly inside the outer edge of the cookie. Leave a little bit of room for dragging the icing outwards. Fill in the circle with black icing. As soon as the circle is full, take the white icing and pipe a dollop in the center of the cookie. Pipe concentric circles of white icing around the dollop, leaving some space in between each circle.

Take a toothpick and drag it through the icing, starting at the center dollop and making lines outwards to the edge of the cookie. Only drag from the middle outwards, otherwise the cobweb will look more like a flower! You may want to wipe excess icing off the toothpick in between each line you make so that the colors don’t begin to blend together. Repeat with the remaining cookies, then allow the cookies to dry at room temperature for about 6 hours or overnight in an airtight container.

Step 7 (Optional): Spider Design
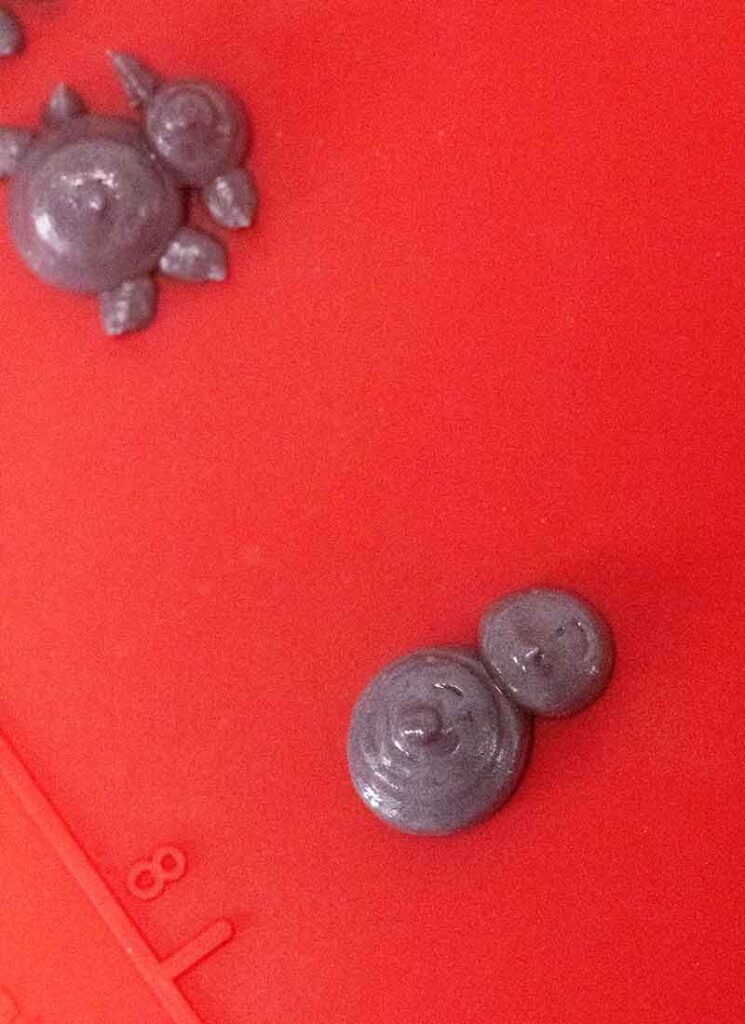
You can stop now, but if you’d like to add spiders, do so now while the cookies are drying! Line a baking sheet with parchment paper and pipe spiders with the remaining black icing. Allow them to dry until completely firm, for about 2-3 hours. They will take less time to harden than the cookies because of the smaller surface area.
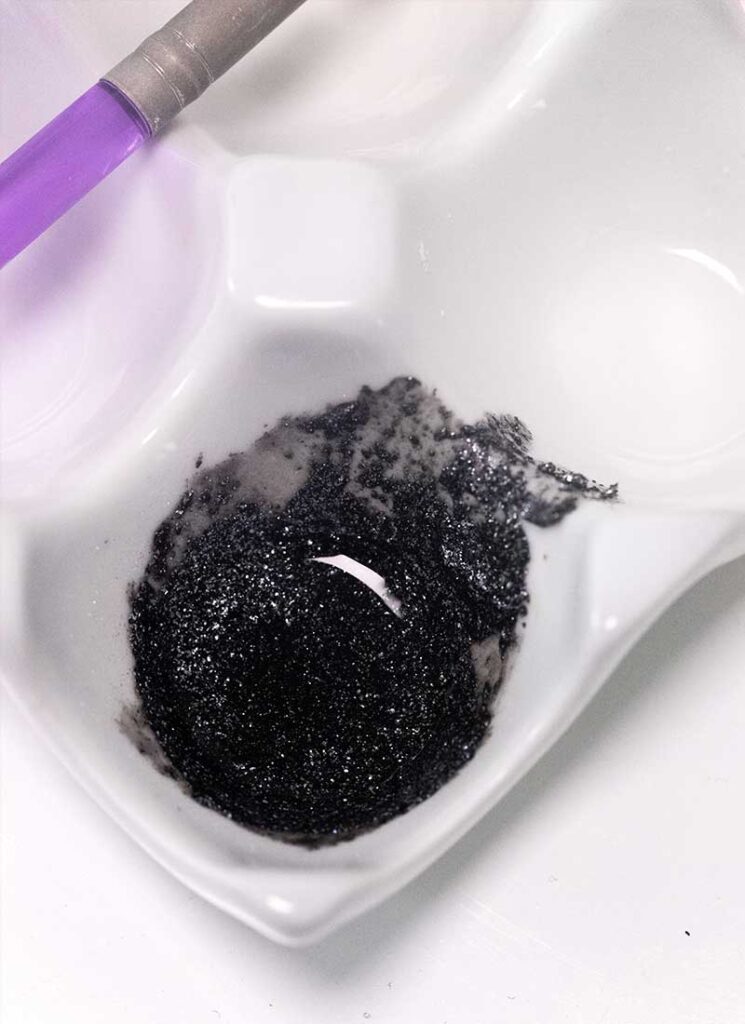

Once the spiders have dried, take a small dish and combine 1 tsp of black edible glitter with 1-2 drops of lemon extract. Mix until the glitter has dissolved and looks like metallic, liquidy paint. Use a clean paintbrush to paint the glitter onto the spiders. Allow the paint to dry to the touch at room temperature, then set aside until the base cookies have dried. Gently peel the spiders off the parchment paper and use a tiny amount of excess icing as glue to attach them to the web cookies. Enjoy!


Tips for Making Perfect Spider Web Cookies
- After mixing the cookie dough, chill it in the refrigerator for at least 30 minutes. This helps prevent the cookies from spreading when baking and ensures they maintain the optimal shape and texture.
- Roll out the cookie dough to a uniform thickness, about ¼ inch, for consistent baking. Use rolling pin guides or stack two sheets of parchment paper as a guide for even cookies.
- Ensure the butter, egg, and milk are at room temperature before mixing to help the ingredients combine smoothly for a tender, cohesive dough.
- Hold the piping bag at a 45-degree angle and use steady pressure to create even lines. Practice piping a few spider web designs on parchment paper before decorating for the best Halloween cookies.
- Allow the base layer of icing to set completely before adding additional details. This prevents colors from bleeding and ensures the web designs stay crisp and defined.

Serving Suggestions
These cute Halloween sugar cookies make a spooky and delicious addition to holiday dessert tables! They are also perfect for packing in individual bags for a fun and festive classroom treat kids will love.
Storage Directions
At room temperature – Store the Halloween royal icing cookies in an airtight container at room temperature for up to 1 week to keep the cookies fresh and preserve the crispness of the icing.
In the refrigerator – If you prefer a firmer royal icing Halloween cookies texture, store in an airtight container container in the refrigerator for up to 2 weeks.
In the freezer – These Halloween treats can also be frozen in a freezer-safe container for up to 3 months. Defrost at room temperature for 30 minutes, until thawed.
Other Halloween Dessert Recipes to Try

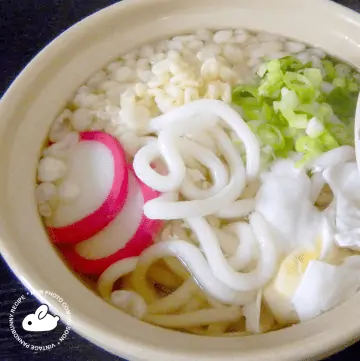
Soft, chewy eyeballs made from rice flour are stuck onto skewers and served with spooky strawberry syrup!
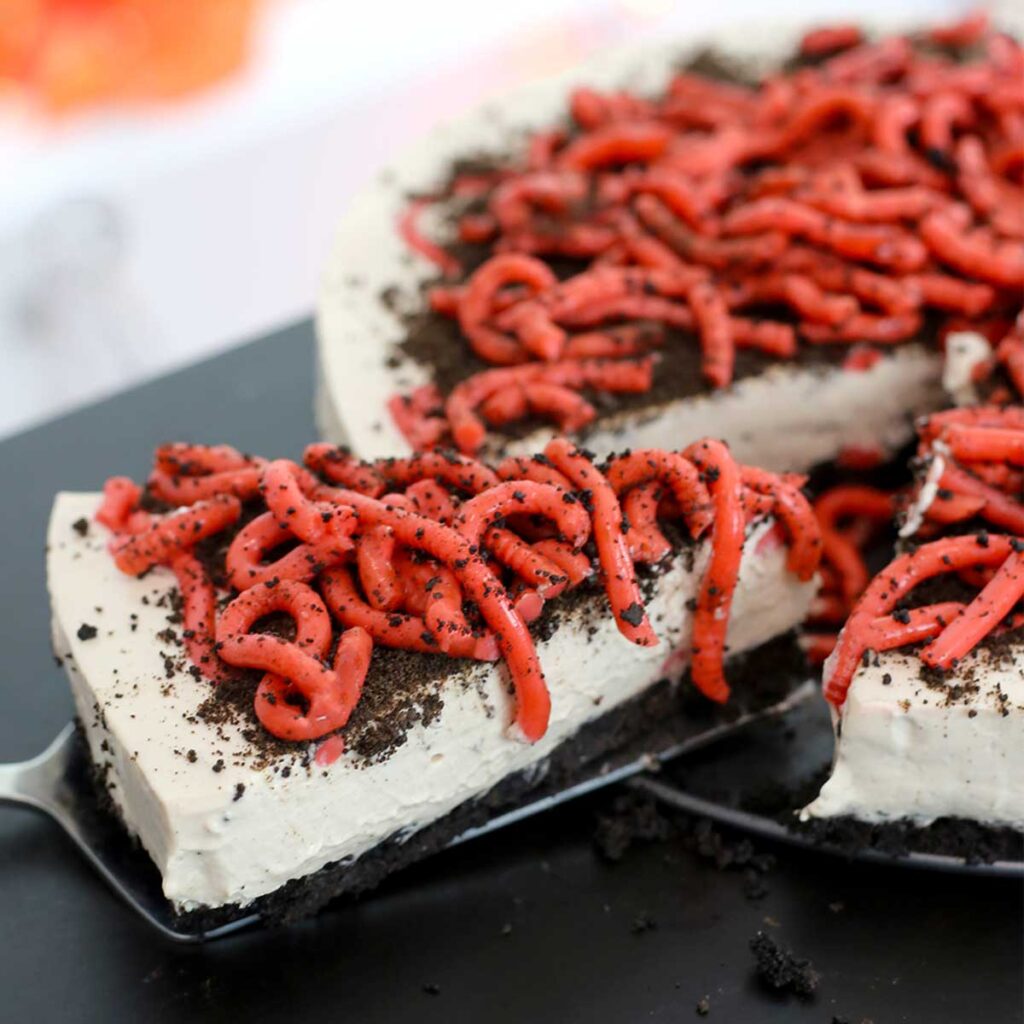
My classic cheesecake recipe with homemade worms (made from jello!) mixed in. Are you brave enough to take a bite?
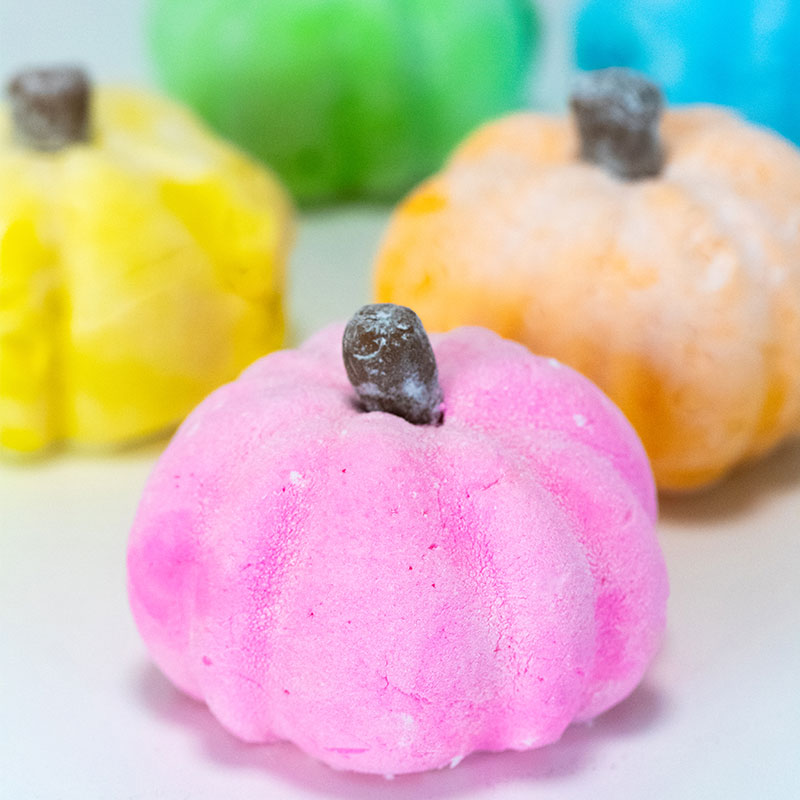
Sweet, bouncy vanilla marshmallows with Tootsie Roll stems. Keep them rainbow for a colorful Halloween treat or go classic with orange pumpkins!
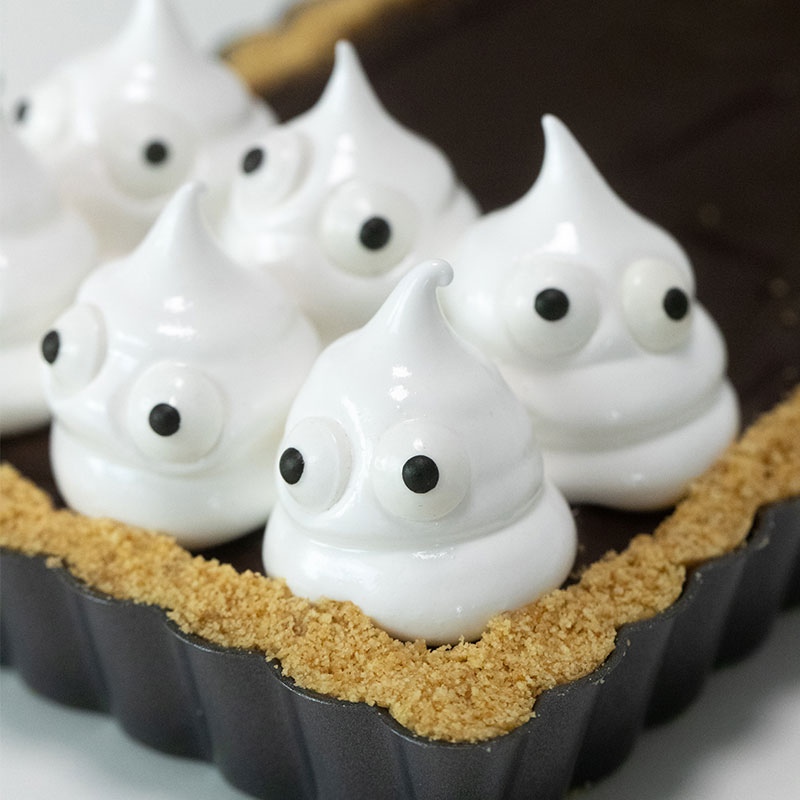
S’mores Marshmallow Ghost Tart
A buttery graham cracker crust filled with rich, dark chocolate ganache and topped with marshmallow ghosts!

Spider Web Cookies
These Spider Web Cookies are a hauntingly delicious treat perfect for Halloween parties and spooky celebrations! Soft sugar cookies are topped with intricate royal icing webs for a fun and festive dessert.
Equipment
Ingredients
Cookie Dough
- 2 cups all-purpose flour
- ¼ tsp salt
- ½ tsp baking powder
- ½ cup unsalted butter room temperature
- 1 cup granulated sugar
- 2 tbsp milk
- 1 large egg
- ½ tsp vanilla extract
- black food coloring
Royal Icing
- ¾ cup warm water
- 5 tbsp meringue powder
- 1 tsp cream of tartar
- 1 kg powdered sugar
- black food coloring
- 1 tsp black edible glitter
- lemon extract or any clear extract that isn’t too potent in flavor. Vodka also works!
Instructions
Bake the cookies:
- Mix together the flour, salt and baking powder in a bowl.
- In a separate bowl, cream the butter and sugar with an electric mixer until it becomes light and fluffy. Add the milk, egg, vanilla and several drops of black food coloring and mix well.
- Slowly add the dry ingredients and mix until just combined.
- Shape the dough into a ball, wrap in plastic wrap and chill in the fridge for 1 hour.
- Roll the dough on a floured surface until ¼-inch thick. Use a 3” round cookie cutter to cut out the cookies and place them on a baking sheet lined with parchment paper.
- Bake the cookies at 350F for 10 minutes, until the edges are just starting to brown.
- Once they are removed from the oven, place another sheet of parchment paper on top of the cookies, followed by another baking sheet. Press down firmly. This will flatten any tops of cookies that have risen and ensure that the tops are smooth and flat. Remove the additional baking sheet and parchment paper and cool the cookies completely.
Make the royal icing:
- Pour the warm water into a large bowl. Add the meringue powder and whisk for a couple seconds until frothy. Add the cream of tartar and whisk again.
- Add the powdered sugar all at once and using an electric mixer, mix on low speed for 10 minutes. The icing should stay on the surface for 5-7 seconds when drizzled. Add the vanilla extract and mix well.
- Dye 1/3 cup of icing red. Divide the icing into 2 bowls. Leave one bowl white and dye the other bowl black.
- Place the icing into piping bags fitted with small, round piping tips.
Decorate:
- Working with one cookie at a time, pipe an outer circle of black icing onto the cookie, just slightly inside the outer edge of the cookie. You want to leave a little bit of room for dragging the icing outwards.
- Fill in the circle with black icing.
- As soon as the circle is full, take the white icing and pipe a dollop in the center of the cookie. Pipe concentric circles of white icing around the dollop, leaving some space in between each circle.
- Take a toothpick and begin to drag it through the icing, starting at the center dollop and making lines outwards to the edge of the cookie. Only drag from the middle outwards, otherwise the cobweb will look more like a flower! You may want to wipe excess icing off the toothpick in between each line you make, so that the colors don’t begin to blend together.
- Repeat with the remaining cookies, then allow the cookies to dry at room temperature for about 6 hours or overnight.
- You can stop at this point, but if you’d like to add spiders, do so now while the cookies are drying! Line a baking sheet with parchment paper and pipe spiders with the remaining black icing. Allow them to dry until they are completely firm, about 2-3 hours. They will take less time to harden than the cookies because of the smaller surface area.
- Once the spiders have dried, take a small dish and combine 1 tsp of black edible glitter with 1-2 drops of lemon extract. Mix until the glitter has dissolved and looks like metallic, liquidy paint.
- Use a clean paintbrush to paint the glitter onto the spiders. Allow the paint to dry to the touch at room temperature, then set aside until the base cookies have dried.
- Gently peel the spiders off the parchment paper and use a tiny amount of excess icing as glue to attach them to the web cookies. Enjoy!
Tried this recipe?Let us know how it was!

Hi everyone! My name is Cayla Gallagher and I’m the creator of pankobunny!
I’m In The Mood For:
@pankobunny
This error message is only visible to WordPress admins
Error: Invalid Feed ID.