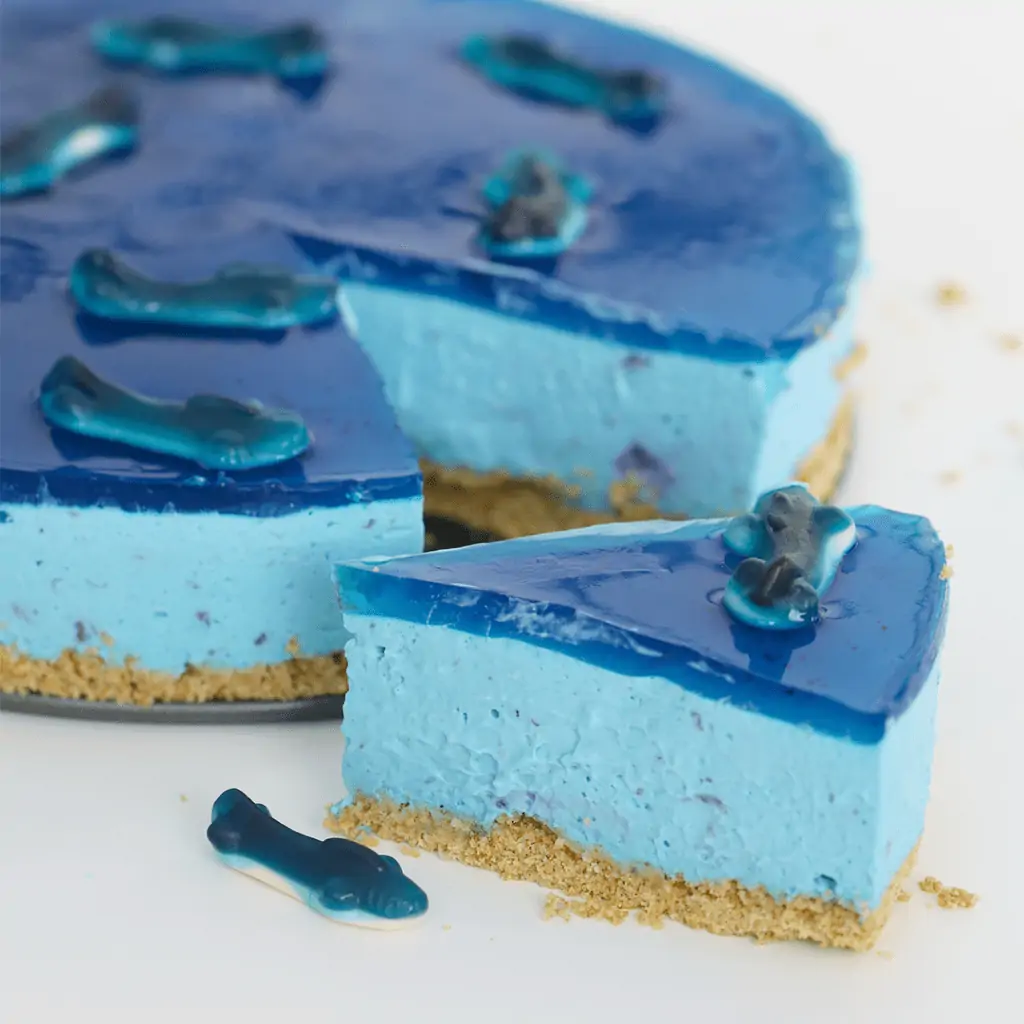
3 Shark Week Dessert
Ingredients
Shark Pool Cheesecake
Cheesecake base:
- 200 g graham crackers crumbled into very small pieces
- 65 g unsalted butter melted
Cheesecake filling:
- 400 g cream cheese room temperature
- 400 ml whipping cream
- 80 g sugar
- ¼ cup lemon juice
- ½ tsp vanilla extract
- 5 tbsp blueberry jam
- 2 tsp powdered gelatin
- 2 ½ tbsp water
Topping:
- 1 tbsp powdered gelatin
- ½ cup water
- 1 cup water
- 2 tbsp sugar
- 1 tbsp blueberry jam
- blue food coloring
- gummy sharks
Shark Truffles
- makes 20 truffles
- ½ cup unsalted butter room temperature
- 1 cup sugar
- ½ tsp vanilla extract
- 3 eggs room temperature
- 1 ½ cups all-purpose flour
- ½ tsp baking soda
- ½ tsp salt
- ¾ cup sour cream
- 2 cups vanilla frosting
- 5 cups white candy melts
- 1/3 cup black candy melts
- ¼ cup vegetable shortening melted
- 40 mini chocolate chips
Shark Fin Coconut Pudding
- ½ cup granulated sugar
- 3 tbsp cornstarch
- pinch salt
- ½ cup heavy cream
- 2 large egg yolks
- 1 ½ cups coconut cream
- 1/2 tsp vanilla extract
- ½ tsp coconut extract
- 2 tbsp unsalted butter
- blue food coloring
- Black candy melts melted
- Whipped cream
Instructions
Shark Pool Cheesecake
- First, make the base of the cheesecake. Mix together the melted butter and crumbled graham crackers, then press them into the bottom of an 8-inch spring form pan. Then place this in the fridge while you make the filling.
- To make the filling, place the cream cheese in a bowl and with an electric mixer until smooth. Add the sugar and combine. Then add the whipping cream, lemon juice, vanilla extract and blueberry jam and mix until smooth. Add the blue food coloring and dye it your desired shade of blue. Mix together the gelatin and water in a small bowl and microwave for 30 seconds. Add the gelatin to the filling, and mix together with an electric mixer until fully combined.
- Pour the filling into the cake pan and return to the fridge to chill until set (approx. 3 hours).
- To make the jelly topping, combine the gelatin and 1/2 cup water in a small bowl, and mix together. Allow to develop for 5 minutes. Pour the water, sugar and blueberry jam into a small pot over medium heat. Add the gelatin to the pot, and mix well. Strain the mixture to remove the blueberry pieces from the jam – we only want the blueberry flavour! Allow the mixture to cool for about 10-15 minutes, then gently pour half of the jelly onto the top of the cheesecake.
- Return the cheesecake to the fridge and chill until the jelly has set (approx 30-45 minutes). Decorate the top of the cheesecake with shark gummies, then pour the remaining jelly on top. This will make it look like the gummies are swimming IN the jelly! Return the cheesecake to the fridge to finish setting, for about 1 hour.
- Carefully remove the cake from the spring form pan by running a sharp knife around the edges of the cake, then release the sides of the pan and carefully slide off the cake. This is to ensure that the jelly topping stays intact and doesn’t tear. Enjoy!
Shark Truffles
Make the filling:
- Beat the butter and sugar with an electric mixer until light and fluffy. Add the vanilla extract and eggs and beat until combined. In a separate bowl, combine the flour, baking soda and salt. Add the flour mixture in 2 additions, alternating with the sour cream.
- Spoon the mixture into a muffin pan lined with muffin liners. Bake at 350F for 20 minutes, or a skewer inserted into the cupcakes comes out clean. Cool completely.
- Crumble the cupcakes into a fine crumb. Add the vanilla frosting and mix well – the mixture should be sticky and easily molded into shapes.
Assembly:
- Divide the mixture into 20 balls, then gently shape into the shark’s body, similar to a teardrop shape.
- Using a sharp knife, slice 1 cup of white candy melts into long, pointed pieces. You will need 5 pieces per truffle.
- Stick one piece into the top of the truffles for the classic shark fin, two into the sides as the side fins, then two into the back as the tail.
- Place the truffles onto a small baking sheet lined with plastic wrap and place in the freezer for 30 minutes, or until firm.
- Combine the remaining white and black candy melts in a bowl – the addition of a few black candy melts will make it grey! Microwave the candy melts for 30 second intervals, or until fully melted.
- Add the melted vegetable shortening and mix until combined. This will give the candy melts a thinner consistency and it will coat the truffles much more evenly. Allow the candy melts to slightly cool, until it is just warm.
- Place a truffle on a fork and lower into the candy melts, fully coating it. Tap the fork on the side of the bowl to remove any excess candy melts, then return the truffle to the baking sheet.
- Immediately stick 2 mini chocolate chips onto the truffle as the eyes – this should be done before the candy melts have set, so you will need to move quickly and do this after dunking each truffle.
- Repeat with the remaining truffles, then transfer the baking sheet to the freezer for the candy melts to fully harden, about 15 minutes.
- Enjoy!
Shark Fin Coconut Pudding:
- Pour the sugar, cornstarch and salt into a pot. Whisk to combine. Add the egg yolks and heavy cream and whisk until well combined. Add the coconut cream and mix well.
- Set the pot to medium-high heat and whisk constantly for 5-10 minutes, until the mixture has thickened and is bubbling.
- Pour the pudding through a sieve, then add the vanilla extract, coconut extract and butter, whisking until well combined.
- Press a sheet of plastic wrap onto the surface of the pudding and place in the fridge until chilled, about 3 hours.
- Divide the pudding into 3 bowls. Dye one bowl light blue and one bowl dark blue.
- Dollop the black candy melts onto a plate lined with parchment paper, creating shark fins. Transfer the tray to the freezer until the candy melts have fully set, about 10 minutes.
- Place all 3 colors of pudding in piping bags fitted with round tips. Pipe a dark blue layer, light blue layer, then white layer into tall glasses. Top with some whipped cream and a shark fin chocolate. Enjoy!
Video
Notes
Want to see more video tutorials? Check out all of my recipes here!
http://www.youtube.com/pankobunny
Tried this recipe?Let us know how it was!