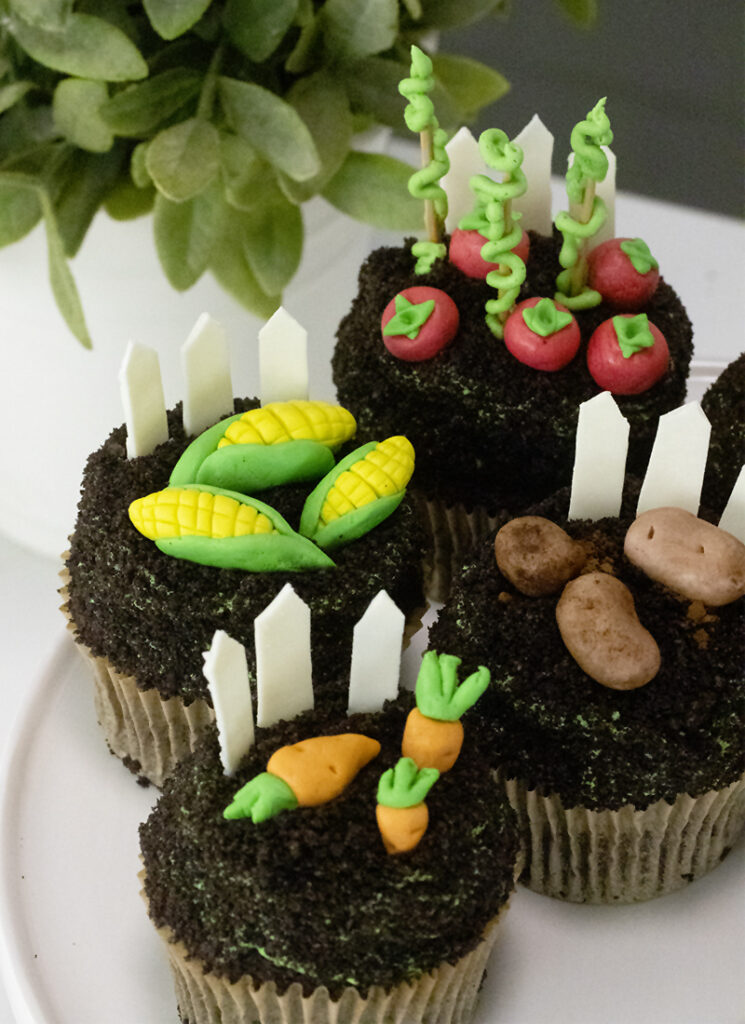
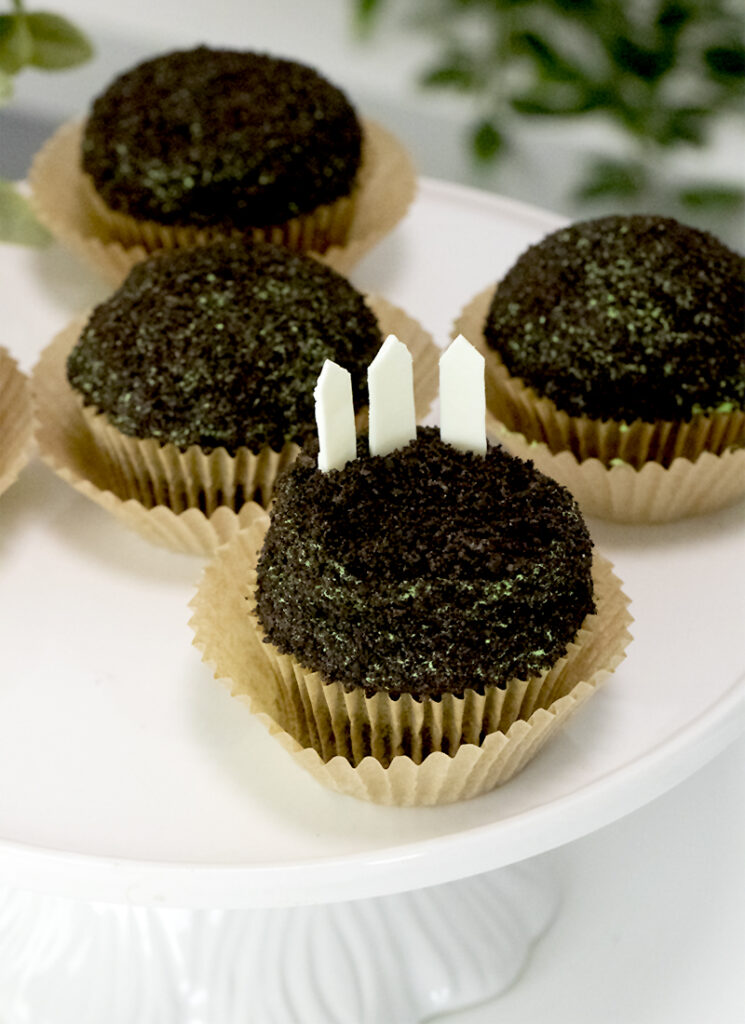
Farm fresh chocolate cupcakes topped with adorable corn, potatoes, tomatoes and more, straight from the veggie patch!
Recipe Ingredients
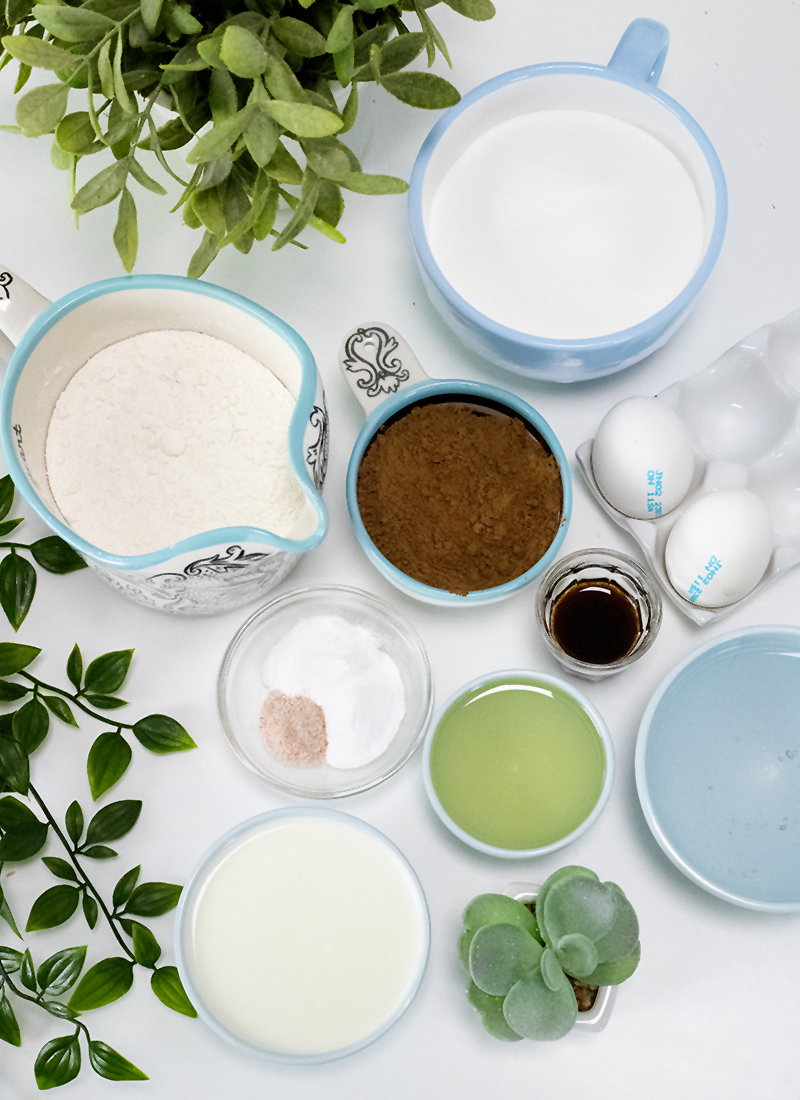
First, we will start with the chocolate cake batter:
- Vegetable oil – you could also use coconut oil for a light coconut flavor.
- Vanilla extract
- Baking soda – Baking soda is crucial in making sure the cake batter rises in the oven.
- Baking powder
- Sugar
- Large eggs – bring these to room temperature
- All-purpose flour
- Salt
- Milk – I like to use 2% milk. If you’re using coconut oil instead of vegetable oil, you can also use coconut milk here! But be sure to use coconut milk and not canned coconut cream, which is much thicker and will change the consistency of the batter. Check out my Chocolate Coconut Bounty Cake for my favorite ways to add coconut to this cake base!
- Boiling water – I know, this sounds so weird to be adding to cake batter! And the batter looks slightlyyyy like pond water after adding it, but I promise that it will make these cupcakes so moist and delicious!
- Cocoa powder – chocolate is the star of these cupcakes, so I recommend using dutch process cocoa powder, which gives such a deep, rich chocolatey flavor.
For the vegetable decorations:
- Modeling Chocolate – an alternative to fondant that actually tastes good! It’s similar to taffy or tootsie rolls, so you’ll feel like you’re still eating a sweet treat instead of gnawing on a hunk of fondant.
- Gel Food Coloring – I love Wilton’s Color Right collection of gel food coloring. It’s super vibrant and far more concentrated than liquid food coloring.
How to Make Veggie Patch Cupcakes
Make the chocolate cupcakes:
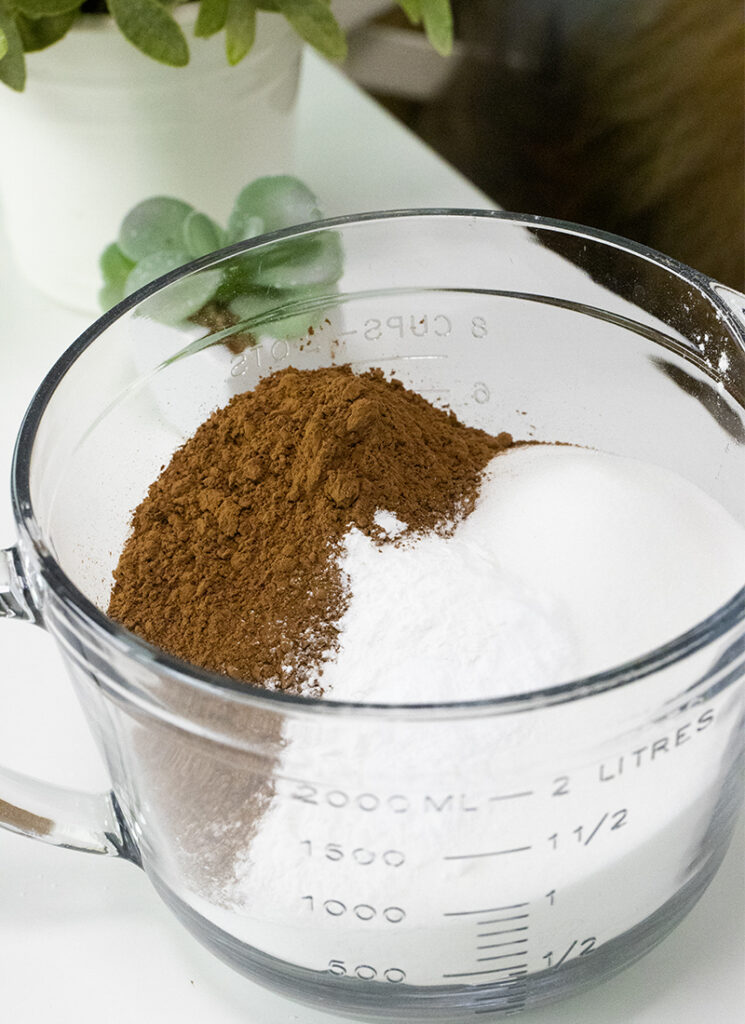
1. Place the flour, sugar, cocoa powder, baking powder, baking soda and salt in a large bowl and mix together.
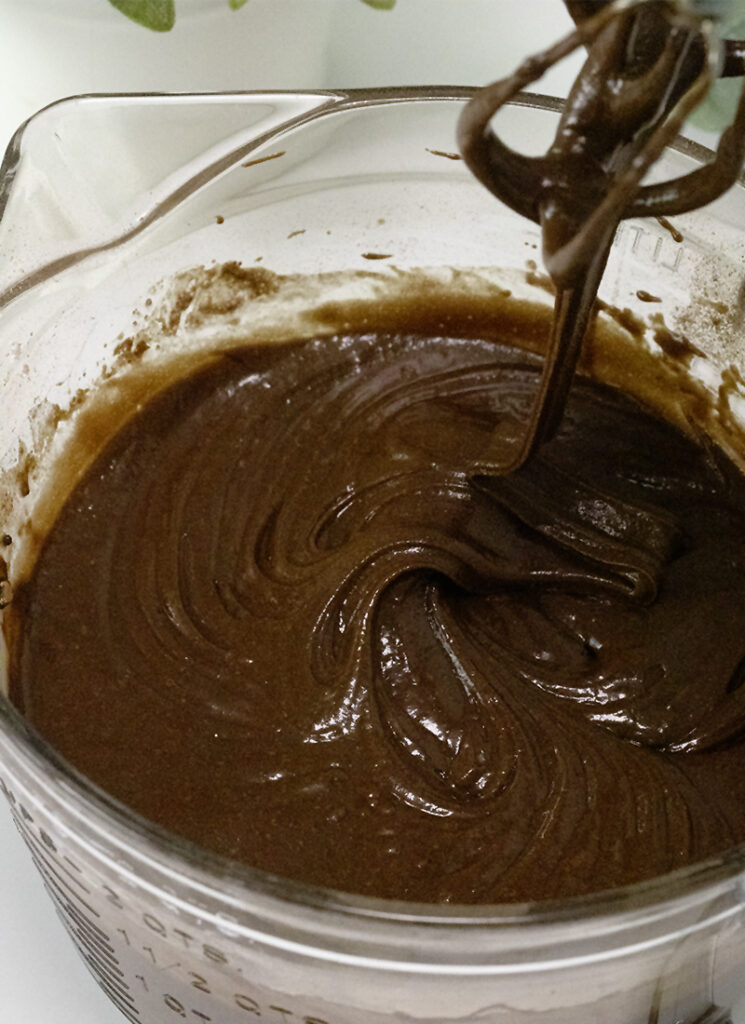
2. Add the milk, vegetable oil, eggs and vanilla extract and mix with an electric mixer until combined.
3. Slowly add the boiling water and mix until well combined.
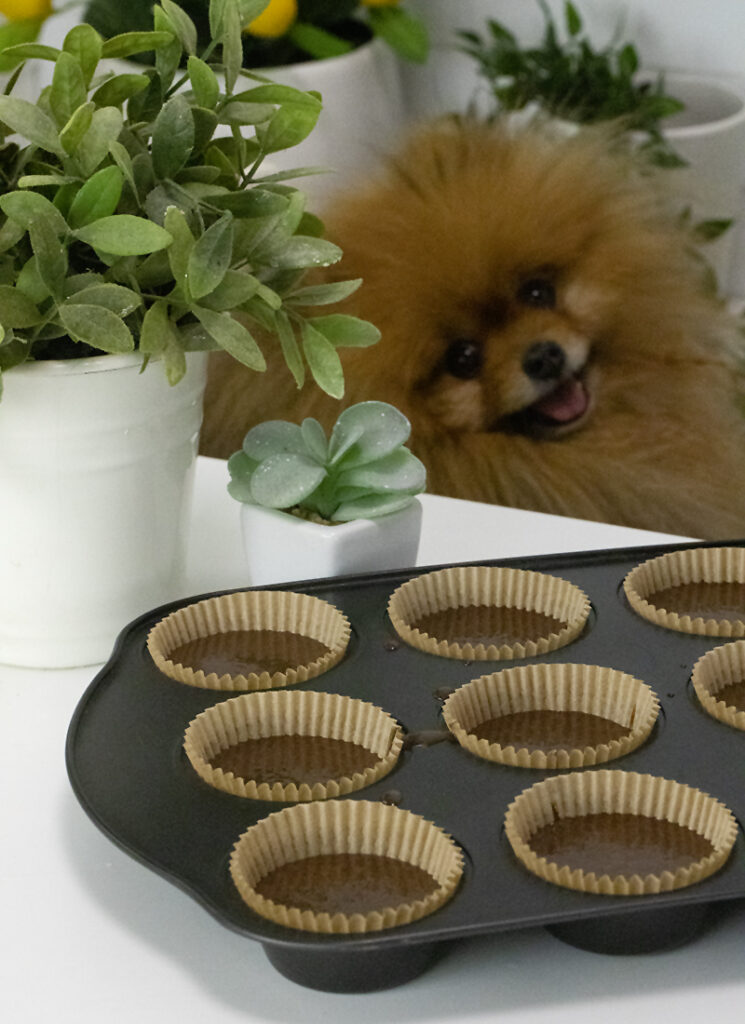
4. Divide the batter evenly between two cupcake pans and bake at 350F for 15-20 minutes, until a skewer inserted into the centers comes out clean. Cool completely!
Make the buttercream:
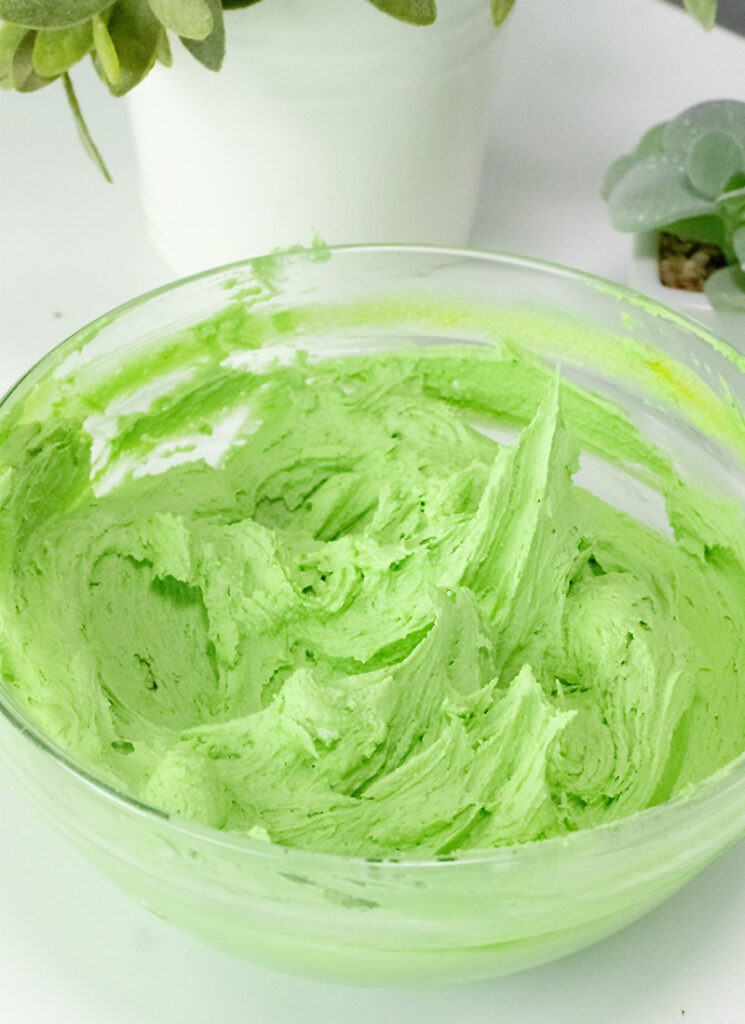
1. Beat the butter with an electric mixer until pale and fluffy. Add the vanilla extract and powdered sugar one cup at a time, beating with each addition.
2. Add some green food coloring until your desired shade is achieved.
Make the white picket fence:
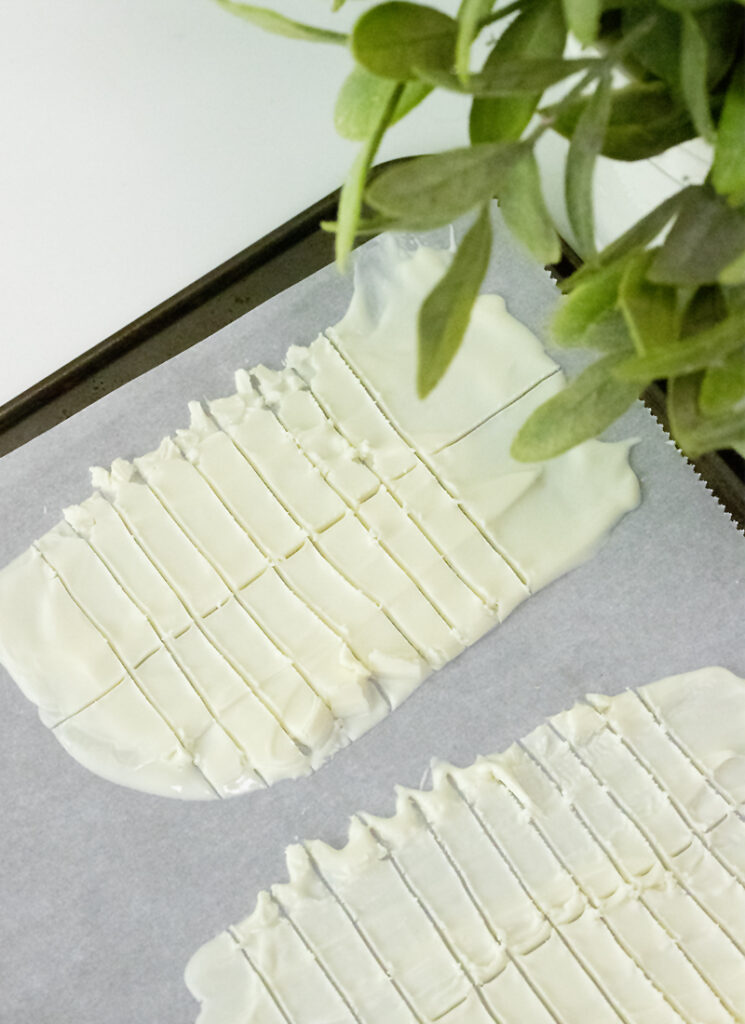
1. Line a baking sheet with parchment paper. Spread the melted white candy melts onto the baking sheet in a sort of rectangular shape, keeping it about 1/8” thick.
2. Allow the candy melts to set at room temperature until they’re about 50% set. Then take a toothpick or a skewer and mark out ¼” vertical sections. Then make 1 or 2 horizontal lines, so that you have created many 2”x1/4” pieces.
3. Place the baking sheet in the fridge for the candy melts to finish setting. Once they have completely hardened, use a sharp knife to cut one end of each rectangle into a point. This will create picket fencing!
Decorate the cupcakes:
1. Place a dollop of buttercream onto the top of a cupcake and roughly smooth the surface. Dunk the cupcake upside down into oreo cookie crumbs, covering all of the buttercream. Repeat with all remaining cupcakes.
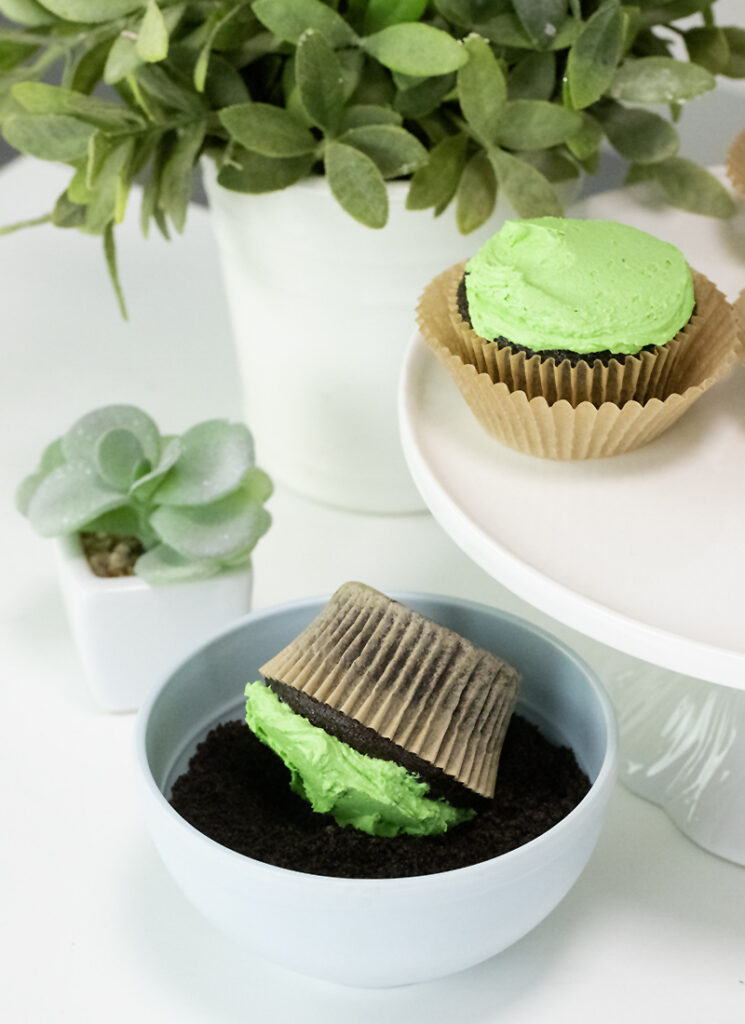
2. Use a spoon to create a small crater in the centre of the buttercream on each cupcake. Sprinkle more oreo crumbs on top. Stick 3 picket fence pieces into each cupcake. Top with your desired veggies!
How to Shape the Modeling Chocolate Vegetables
These veggies can be made several days in advance, so no need to stress at the last minute! Make these whenever you have some extra time on your hands and store on a plate lined with parchment paper at room temperature.
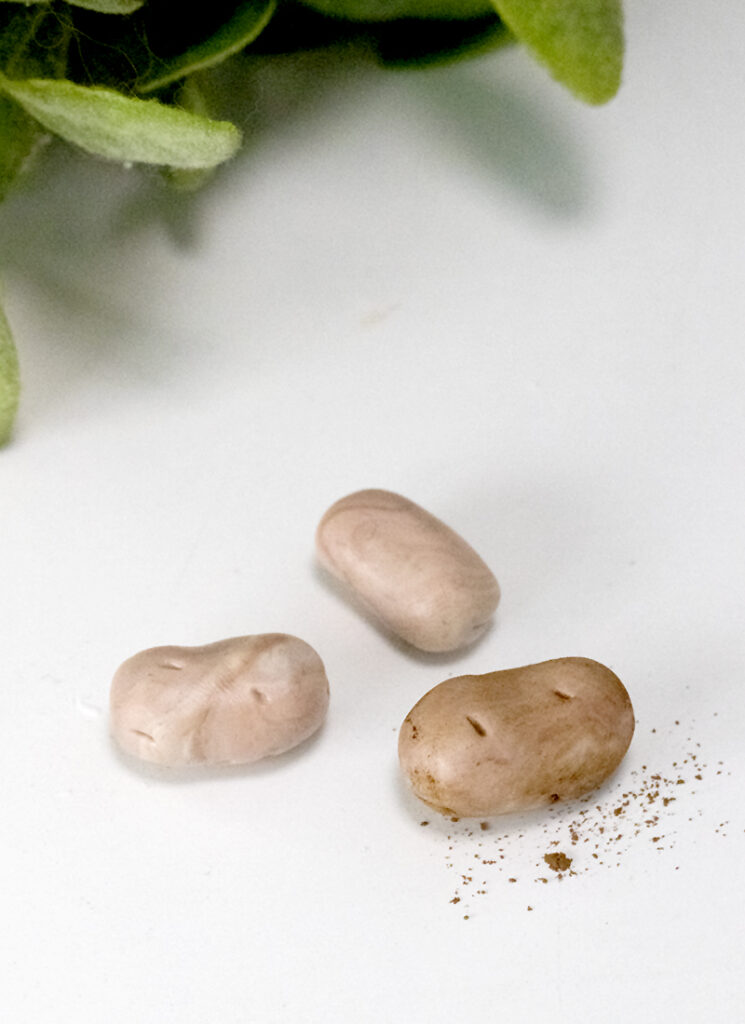
Potato: Using the brown modeling chocolate, take a small piece of modeling chocolate and shape it into a kidney bean shape. Use a sharp knife to make dimples in the potato. Use a food-safe brush to dust cocoa powder onto the surface of the potato.
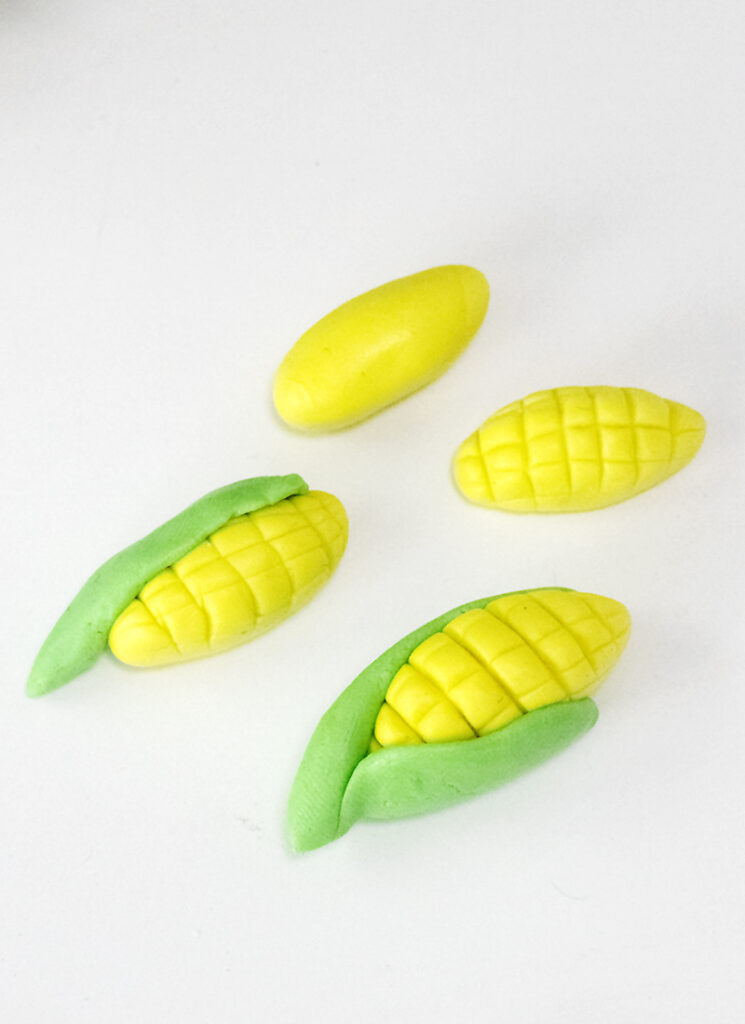
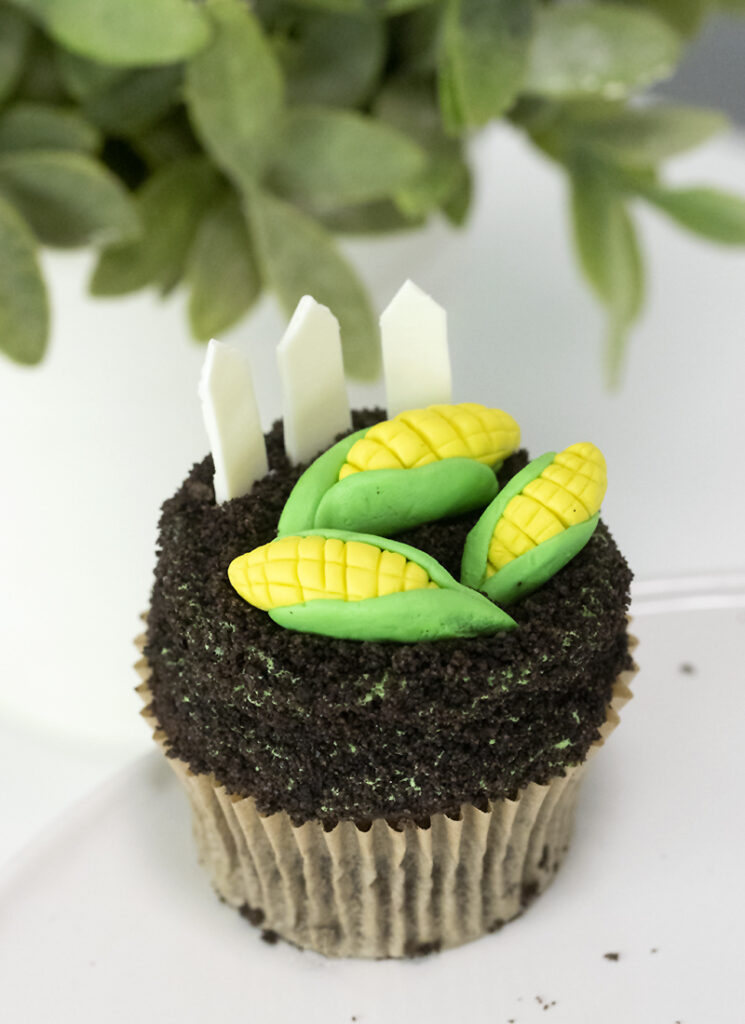
Corn: Take a ½ inch piece of yellow modeling chocolate and shape it into a football shape. Use a sharp knife to first make vertical indentations in the corn, then horizontal, creating the kernels. Take an oval piece of green modeling chocolate, flatten it with your fingers and press it onto one side of the cob of corn. Repeat with a second green piece on the other side of the corn and pinch together at the base, creating a small stem. Trim off any excess green, if desired.
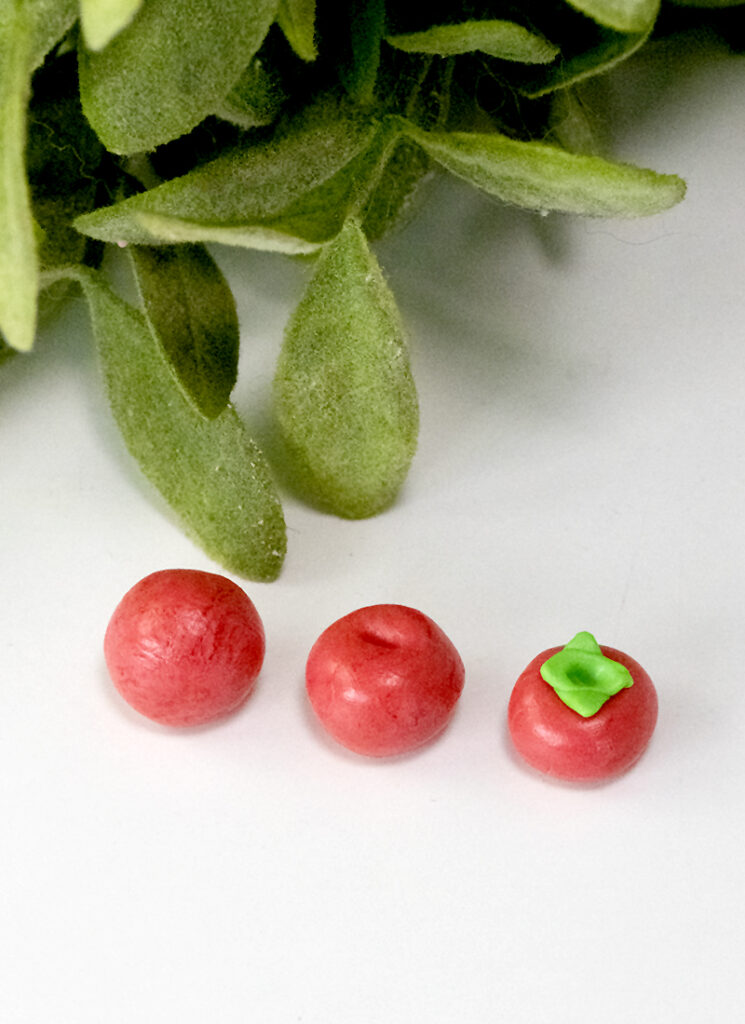
Tomato: Roll a small piece of red modeling chocolate into a ball. Use a sharp knife to create an indentation in the center of the ball. Take two very tiny pieces of green modeling chocolate and roll them into tiny ovals. Place them crosswise on top of the center of the tomato and press your knife into the tomato again, pressing the “stems” into the tomato.
For the tomato vines, place the remaining buttercream into a piping bag fitted with a small, round piping tip. Hold the end of a toothpick in one hand and pipe the buttercream onto the toothpick, while rotating it, so that the buttercream wraps around the toothpick like a vine. Use tweezers to stick the toothpick into the cupcake, then place the tomatoes in the remaining space.
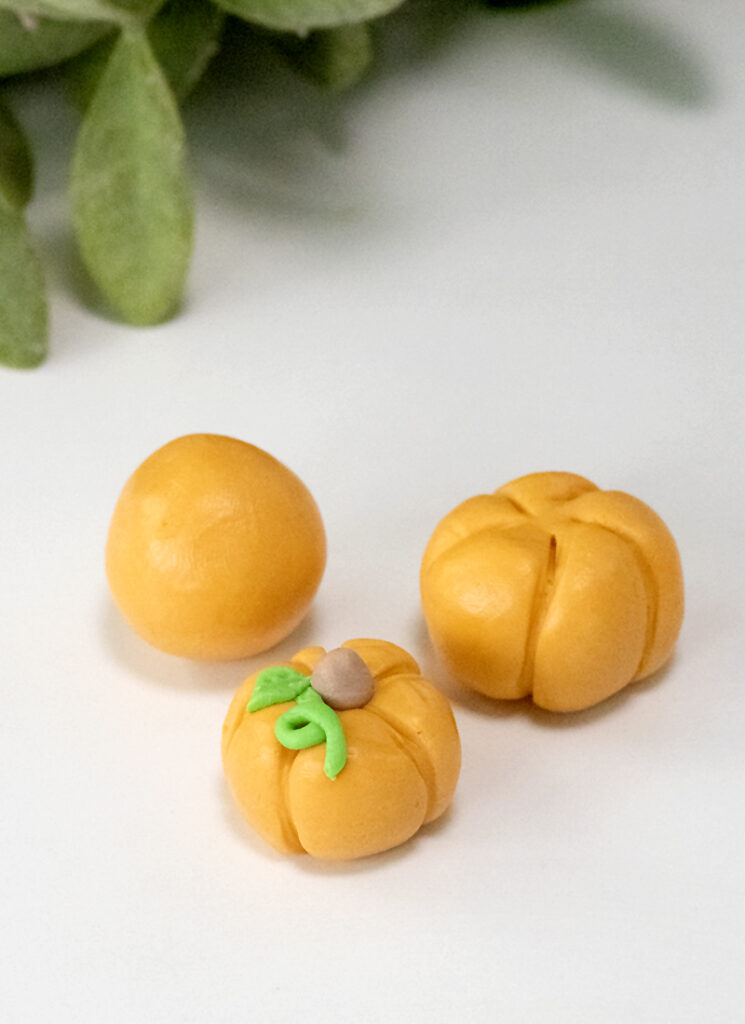
Pumpkin: Roll a tablespoons-sized piece of orange modeling chocolate into a ball. Use the dull side of a knife blade to create vertical indentations in the sides of the pumpkin. Use a tiny piece of brown modeling chocolate for the stem. Roll an even tinier piece of green modelling chocolate into a thin sausage and shape it into a loop, creating the vine of the pumpkin. Take an extra piece of green modeling chocolate, flatten it into a triangle and place it onto the pumpkin as its leaf. You can also use the tip of your knife to create veins in the leaf, if desired.

Purple cabbage: Roll a tiny piece of purple modeling chocolate into a ball. Take another small piece and flatten it into an oval. Wrap it around one side of the ball. Repeat, wrapping it onto the other side of the ball. Continue until it begins to resemble a cabbage. If desired, trim the base off the cabbage so that it sits flat.
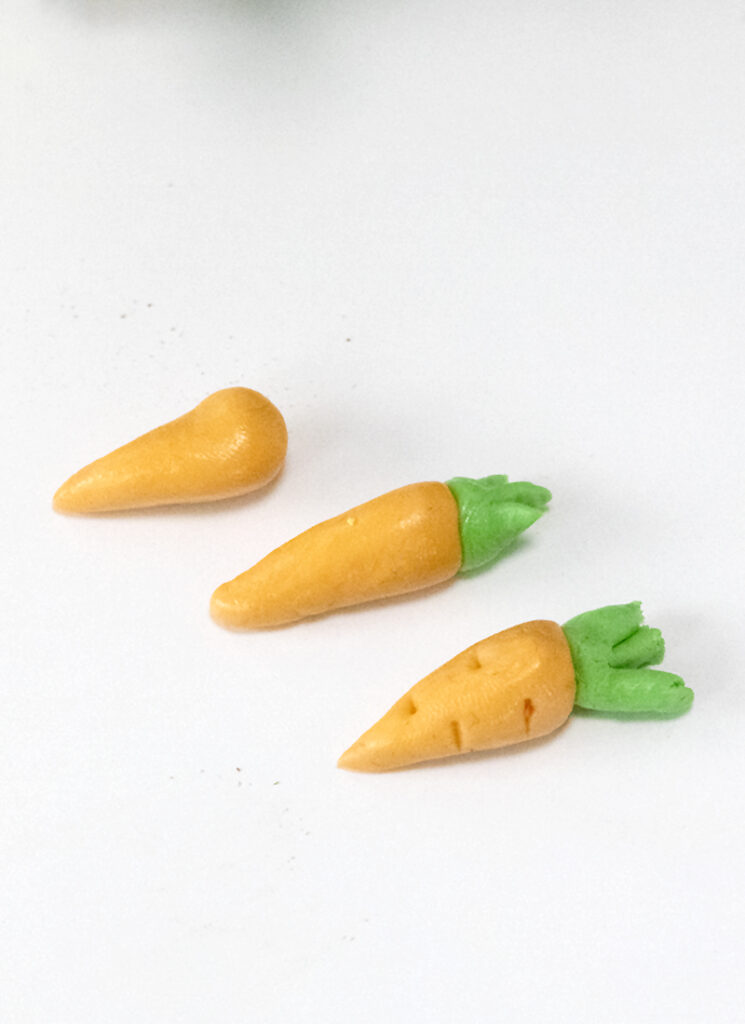
Carrot: Roll a piece of orange modeling chocolate into a ball, then pinch and roll one end to create a cylinder shape. Place a small piece of green modeling chocolate on top and use a sharp knife to cut the end into several pieces. Use the same knife to cut indentations into the sides of the carrot.
Storage Instructions
These cupcakes keep well at room temperature for up to 2 days. Store in a cool and dry place. Alternatively, refrigerate for up to 3 days.
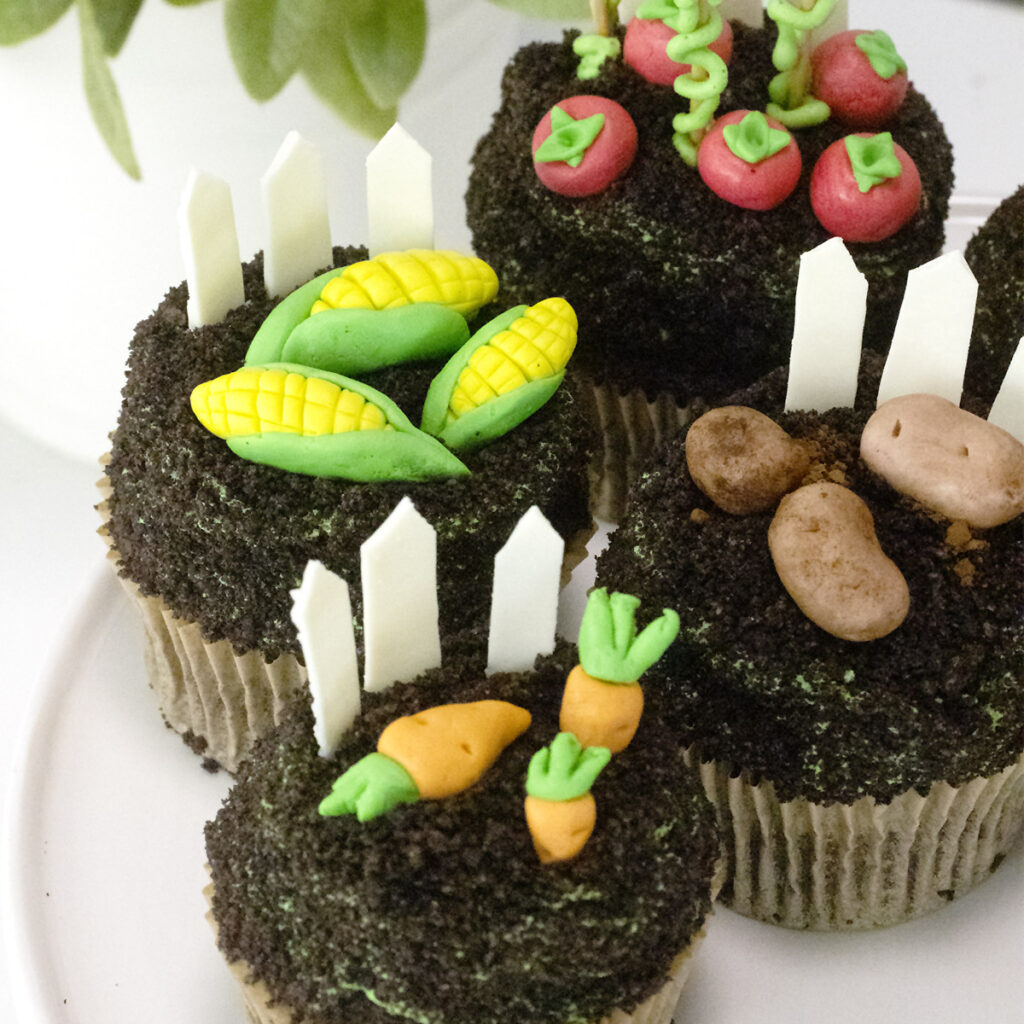
Vegetable Patch Cupcakes
Ingredients
Cupcake batter:
- 2 cups all-purpose flour
- 2 cups sugar
- ¾ cup cocoa powder
- 2 tsp baking powder
- 1 1/2 tsp baking soda
- 1 tsp salt
- 1 cup milk
- ½ cup vegetable oil
- 2 large eggs
- 2 tsp vanilla extract
- 1 cup boiling water
Buttercream:
- 2 cups unsalted butter room temperature
- 1 tsp vanilla extract or seeds from 1 vanilla bean
- 5 cups powdered sugar
- 2 cups oreo cookie crumbs
- 2 cups melted white candy melts
- parchment paper
- 3/4 pound white modeling chocolate
- gel food coloring red, orange, yellow, green, purple and orange
- toothpicks for tomato vines
- 2 tbsp cocoa powder for potatoes
Instructions
Bake the cupcakes:
- Place the flour, sugar, cocoa powder, baking powder, baking soda and salt in a large bowl and mix together.
- Add the milk, vegetable oil, eggs and vanilla extract and mix with an electric mixer until combined.
- Slowly add the boiling water and mix until well combined.
- Divide the batter evenly between two cupcake pans and bake at 350F for 15-20 minutes, until a skewer inserted into the centers comes out clean. Cool for 10 minutes in the pan, then transfer the cupcakes to a wire rack and cool completely.
Make the buttercream:
- Beat the butter with an electric mixer until pale and fluffy. Add the vanilla extract and powdered sugar one cup at a time, beating with each addition.
- Add some green food coloring until your desired shade is achieved.
Make the modeling chocolate veggies:
- Divide the modeling chocolate into 6 balls. Dye it red, orange, yellow, green, purple and brown with the gel food coloring. Modeling chocolate softens with the warmth of your hands, so as you knead it, it will soften and the color will easily incorporate.
- Potato: Using the brown modeling chocolate, take a small piece of modeling chocolate and shape it into a kidney bean shape. Use a sharp knife to make dimples in the potato. Use a food-safe brush to dust cocoa powder onto the surface of the potato.
- Corn: Take a ½ inch piece of yellow modeling chocolate and shape it into a football shape. Use a sharp knife to first make vertical indentations in the corn, then horizontal, creating the kernels. Take an oval piece of green modeling chocolate, flatten it with your fingers and press it onto one side of the cob of corn. Repeat with a second green piece on the other side of the corn and pinch together at the base, creating a small stem. Trim off any excess green, if desired.
- Tomato: Roll a small piece of red modeling chocolate into a ball. Use a sharp knife to create an indentation in the center of the ball. Take two very tiny pieces of green modeling chocolate and roll them into tiny ovals. Place them crosswise on top of the center of the tomato and press your knife into the tomato again, pressing the “stems” into the tomato.
- Pumpkin: Roll a tablespoons-sized piece of orange modeling chocolate into a ball. Use the dull side of a knife blade to create vertical indentations in the sides of the pumpkin. Use a tiny piece of brown modeling chocolate for the stem. Roll an even tinier piece of green modelling chocolate into a thin sausage and shape it into a loop, creating the vine of the pumpkin. Take an extra piece of green modeling chocolate, flatten it into a triangle and place it onto the pumpkin as its leaf. You can also use the tip of your knife to create veins in the leaf, if desired.
- Purple cabbage: Roll a tiny piece of purple modeling chocolate into a ball. Take another small piece and flatten it into an oval. Wrap it around one side of the ball. Repeat, wrapping it onto the other side of the ball. Continue until it begins to resemble a cabbage. If desired, trim the base off the cabbage so that it sits flat.
- Carrot: Roll a piece of orange modeling chocolate into a ball, then pinch and roll one end to create a cylinder shape. Place a small piece of green modeling chocolate on top and use a sharp knife to cut the end into several pieces. Use the same knife to cut indentations into the sides of the carrot.
Make the fencing:
- Line a baking sheet with parchment paper. Spread the melted white candy melts onto the baking sheet in a sort of rectangular shape, keeping it about 1/8” thick.
- Allow the candy melts to set at room temperature until they’re about 50% set. Then take a toothpick or a skewer and mark out ¼” vertical sections. Then make 1 or 2 horizontal lines, so that you have created many 2”x1/4” pieces.
- Place the baking sheet in the fridge for the candy melts to finish setting.
- Once they have completely hardened, use a sharp knife to cut one end of each rectangle into a point. This will create picket fencing!
Decorate the cupcakes:
- Place a dollop of buttercream onto the top of a cupcake and roughly smooth the surface. Dunk the cupcake upside down into oreo cookie crumbs, covering all of the buttercream. Repeat with all remaining cupcakes.
- Use a spoon to create a small crater in the centre of the buttercream on each cupcake. Sprinkle more oreo crumbs on top.
- Stick 3 picket fence pieces into each cupcake. Top with your desired veggies!
- For the tomato vines, place the remaining buttercream into a piping bag fitted with a small, round piping tip. Hold the end of a toothpick in one hand and pipe the buttercream onto the toothpick, while rotating it, so that the buttercream wraps around the toothpick like a vine. Use tweezers to stick the toothpick into the cupcake, then place the tomatoes in the remaining space.

